Developing Kernel Modules for Xilinx Zynq Devices
This tutorial shows how to create, edit and debug a basic kernel module for a Linux kernel built with Petalinux that is running on a Xilinx Zynq FPGA. Before you begin, install VisualKernel 3.1 or later and prepare your Petalinux project for debugging as described in this tutorial. Also ensure your target image includes an SSH server so that VisualKernel can automatically deploy the kernel modules on it.
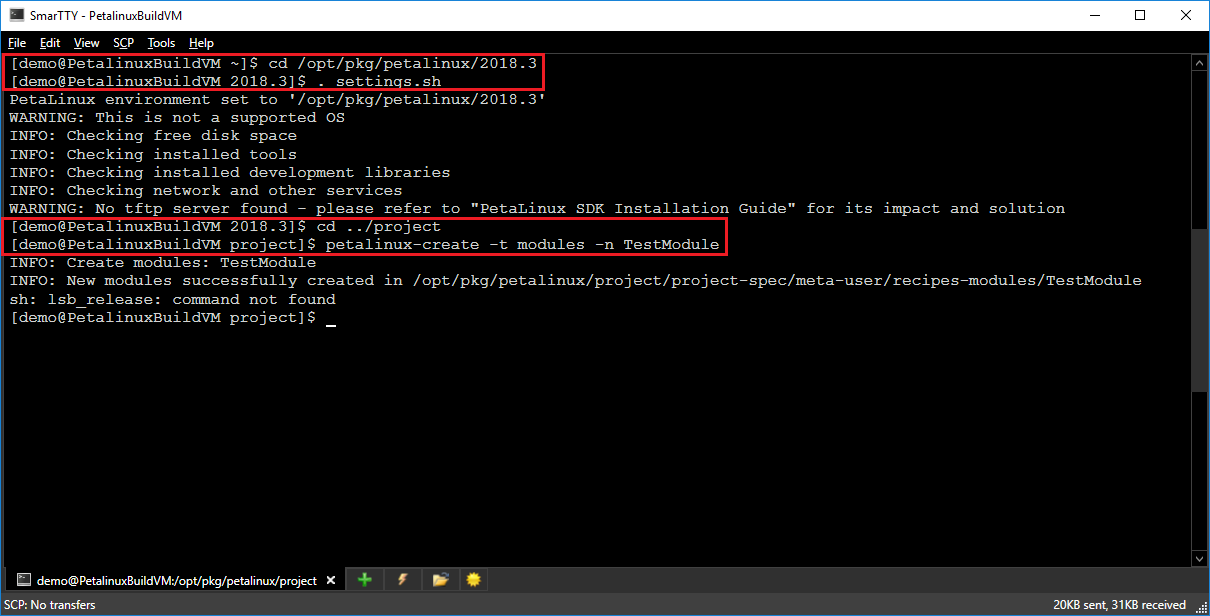
- We will begin with adding a new kernel module to the Petalinux project using the Petalinux tools. If you have already created the module, you can skip this step. If not, connect to your build machine via SSH and run the following commands:
cd <Petalinux tools directory>
. settings.sh
cd <Petalinux project directory>
petalinux-create -t modules -n <module name>
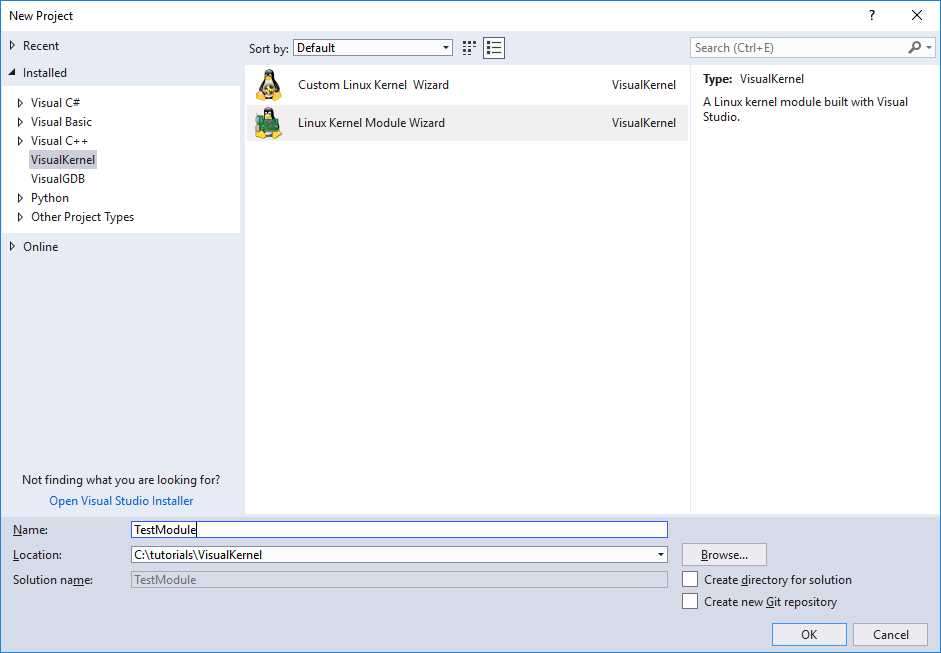
- Start Visual Studio and open the VisualKernel module wizard:
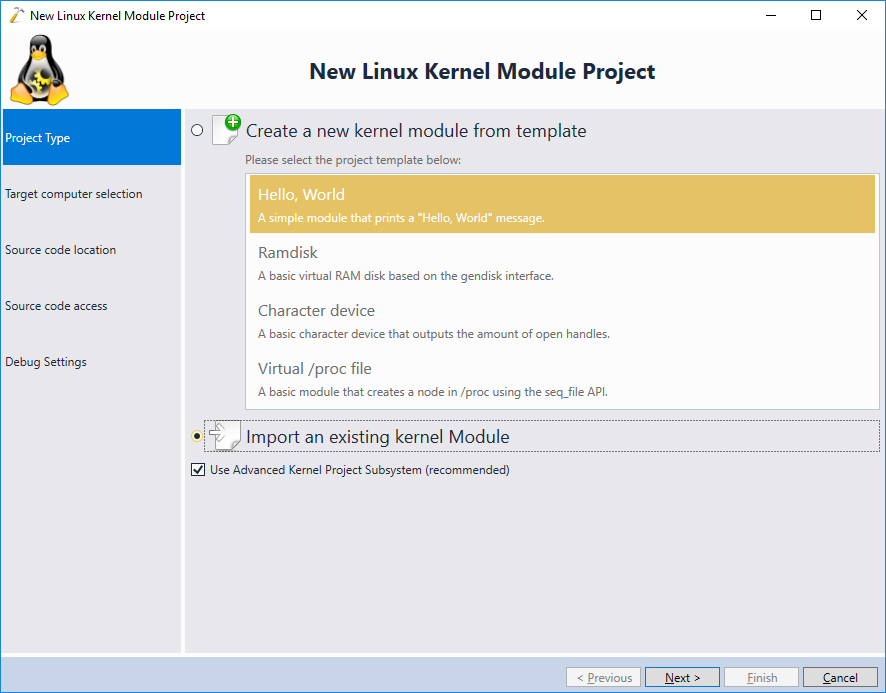
- On the first page select “Import an existing kernel module” and ensure you have the Advanced Kernel Project Subsystem enabled:
- On the target selection page set the following settings:
Setting Value Targeted Linux Computer Your Zynq-based board running the Petalinux kernel with debugging support Build the module on The Linux machine that has the Petalinux tools Compatible GDB binary Full path to arm-linux-gnueabihf-gdb per this tutorial Kernel build environment Configure manually 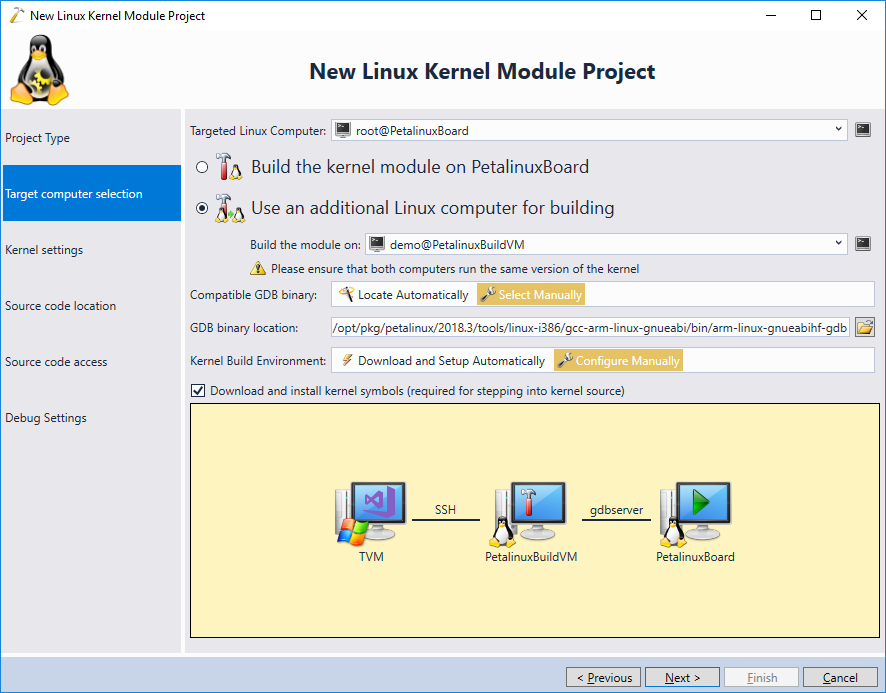
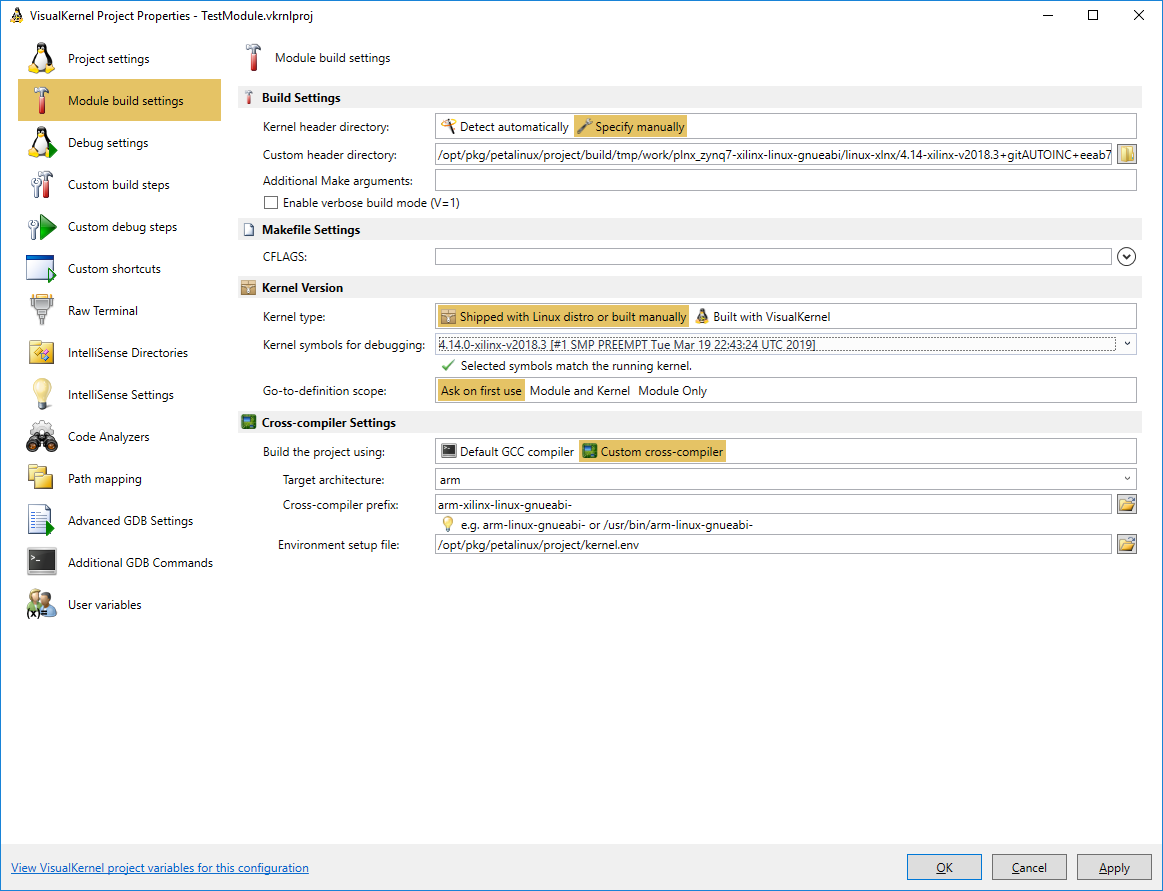
- On the next page configure the settings as shown below:
Setting Value Kernel type Shipped with Linux distro or built manually Kernel header directory The directory containing the vmlinux file with symbols per this tutorial Kernel symbols Skip it for now. We will configure them later. Build the project using Custom cross-compiler Target architecture arm Cross-compiler prefix arm-xilinx-linux-gnueabi- Environment setup file The kernel environment setup file per this tutorial 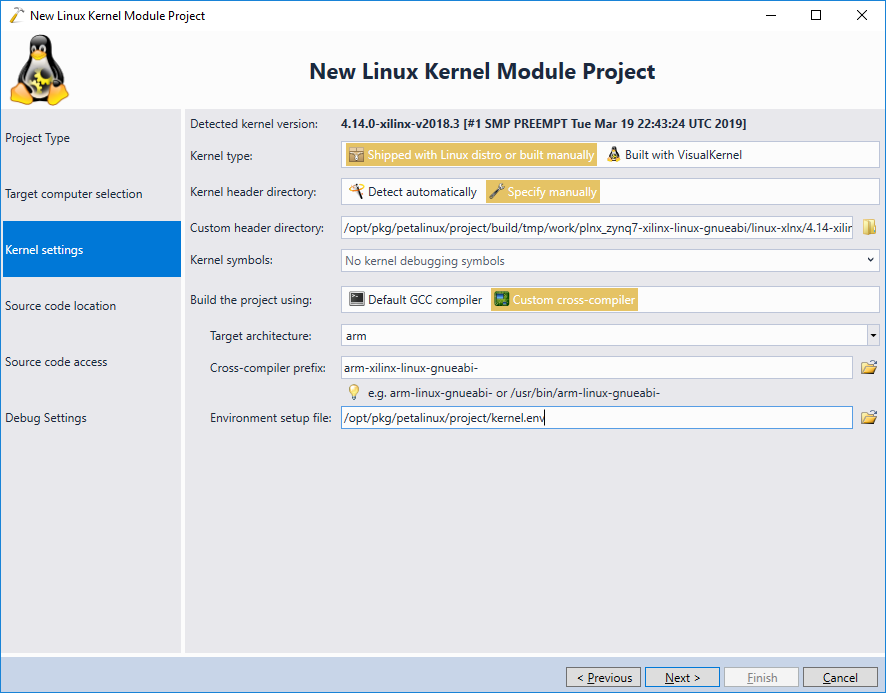
- Now we need to point VisualKernel to the source code of the module created by Petalinux. It will be typically located under <Petalinux Project>/project-spec/meta-user/recipes-modules/<Module name>/files:
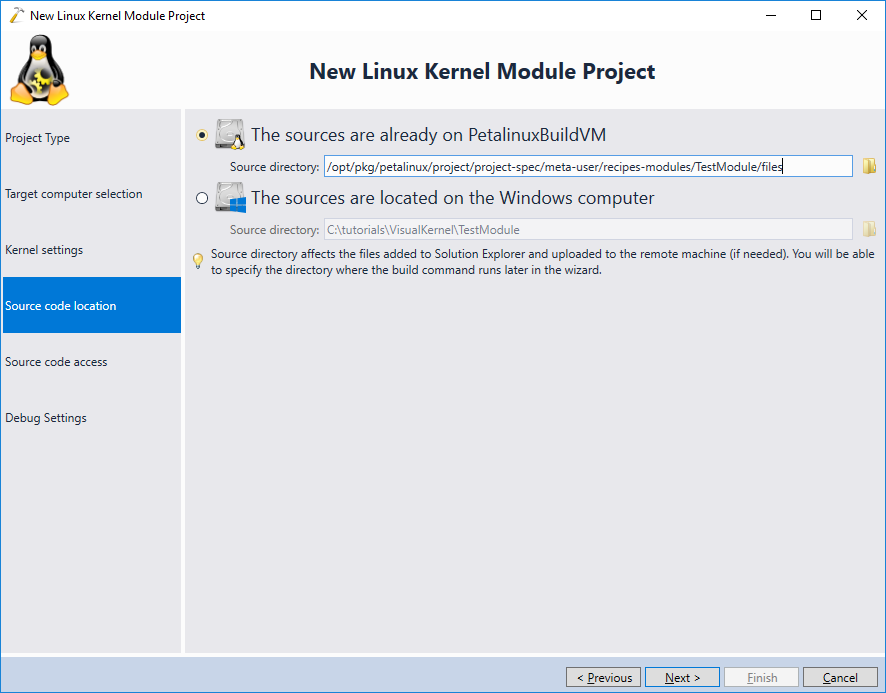
- On the next page proceed with accessing the source code directly via SSH:

- Connect your JTAG programmer to the Windows computer via USB and ensure it is connected to the target board. Then pick it in the “Debug using” field, select your debugged device (depending on the Zynq revision, you may need to modify the scripts shipped with OpenOCD) and click “Test” to verify your settings:

If you are using OpenOCD, ensure the Startup GDB Commands field includes the “mon cortex_a maskisr on” command as otherwise interrupts will interfere with stepping into/over functions and also continuing after a breakpoint. - Press “Finish” to create a project. Once it is created, build it by pressing Ctrl-Shift-B. Initially, VisualKernel will warn that it cannot detect the kernel module name:
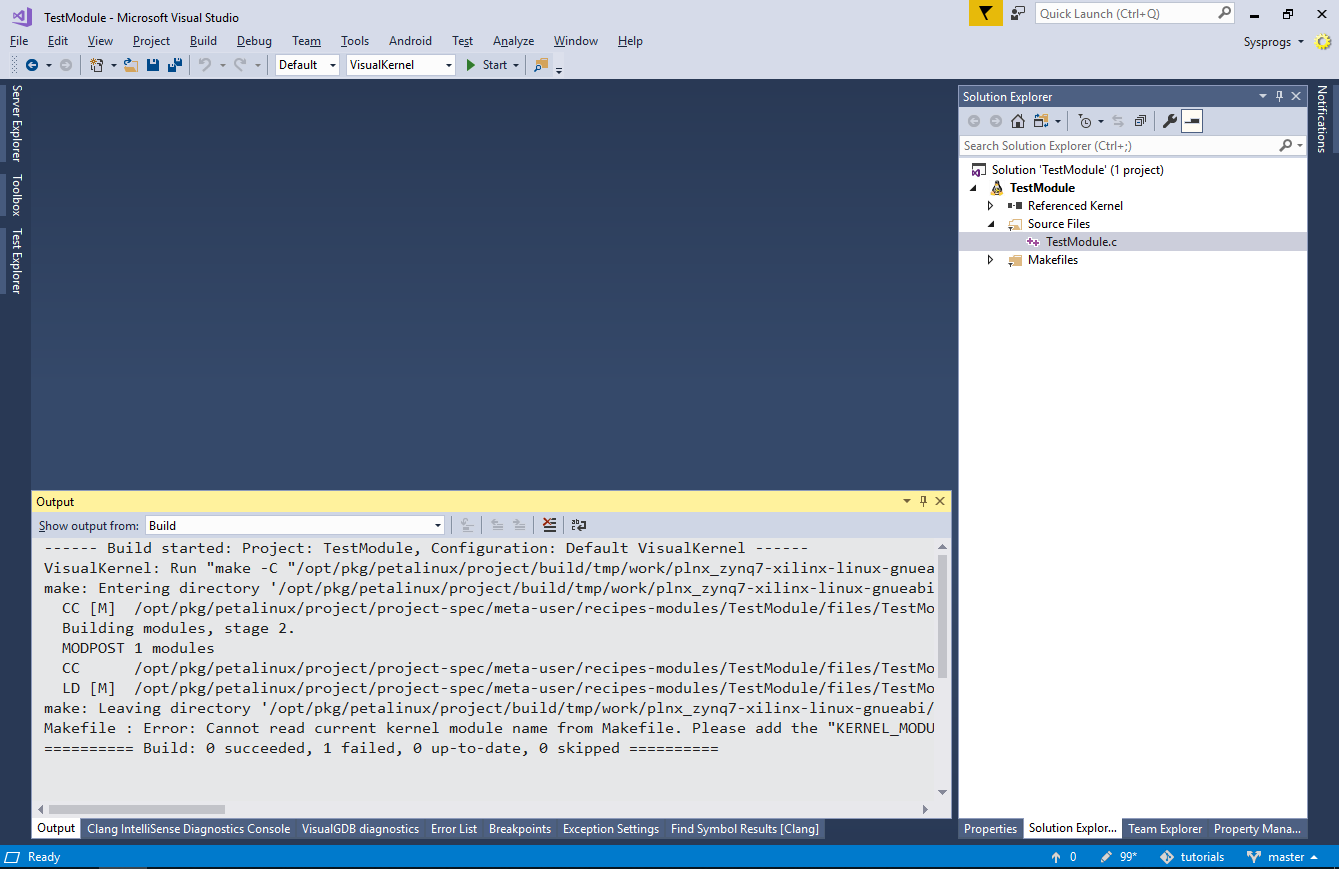
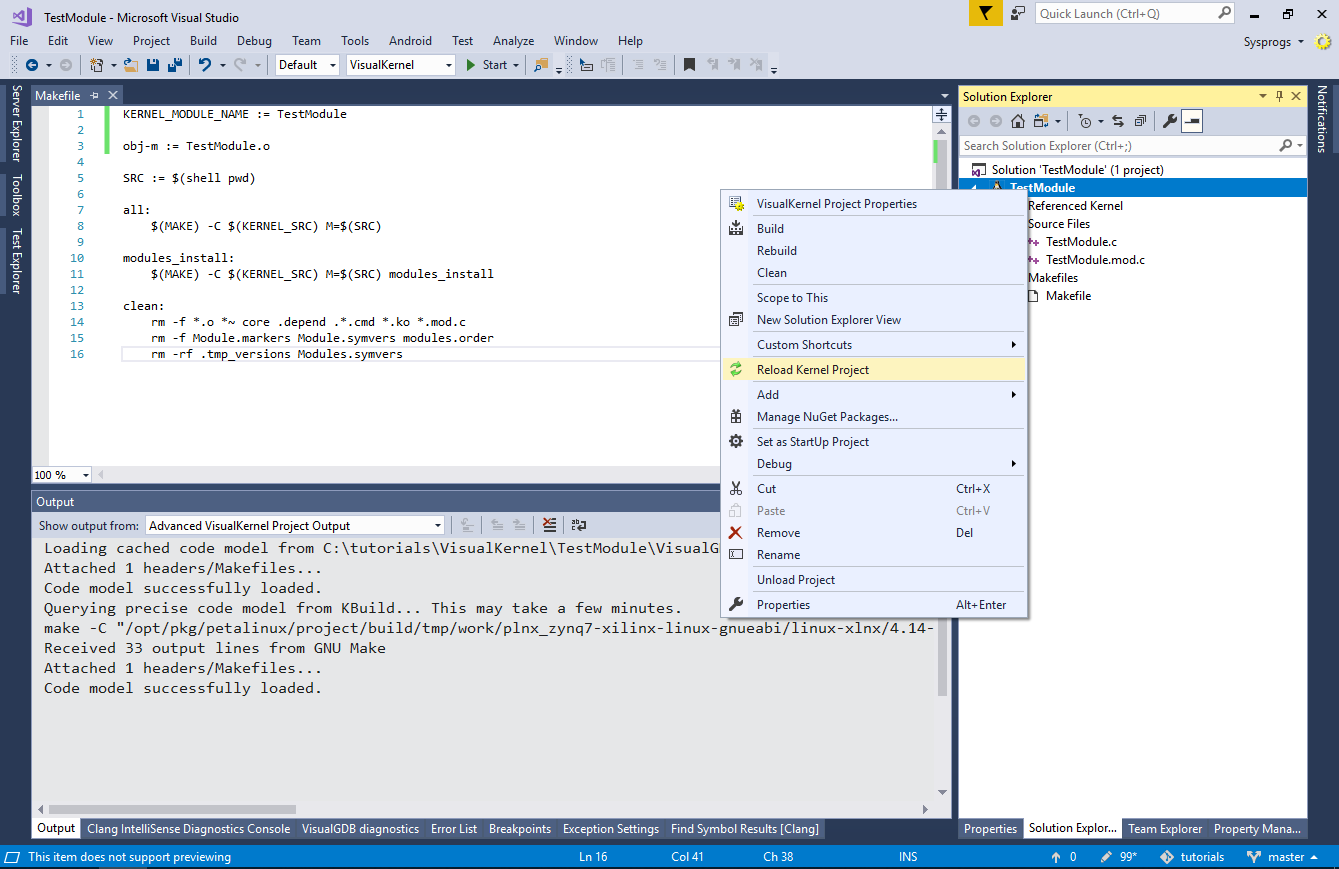
- Add the KERNEL_MODULE_NAME variable to Makefile so that VisualKernel can configure IntelliSense. Then right-click on the project and select “Reload Kernel Project”:
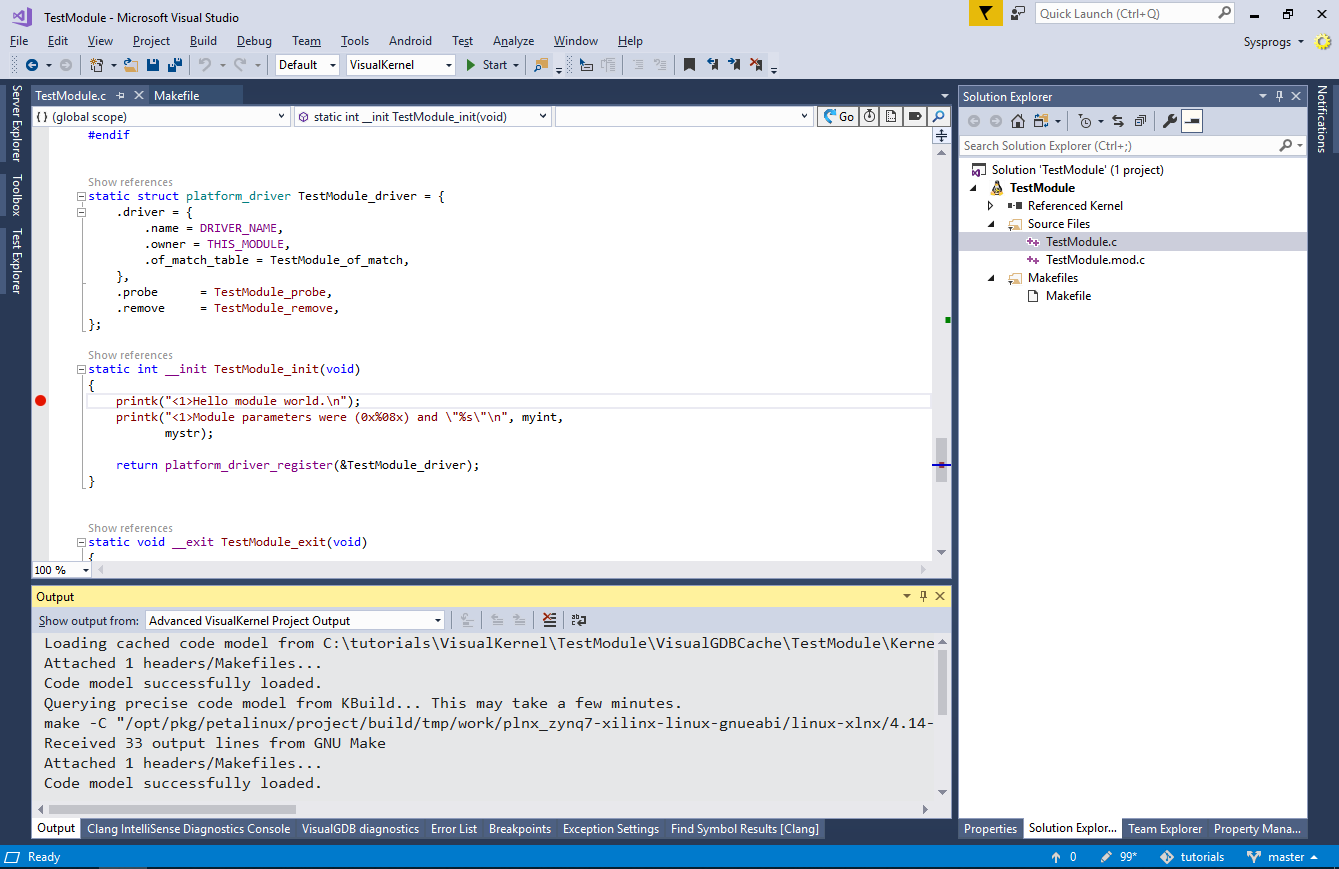
- Now the IntelliSense in the main source file should be very precise. You can double-check that it is loaded correctly by checking the Advanced VisualKernel Project Output in the Output window:
- Now we will configure the debugging settings. Open VisualKernel Project Properties and go to the Debug Settings page. Clear the following settings:
Setting Reason Display kernel output by hooking printk() This slows down debugging due to JTAG latency Build/install a custom kernel module for collecting module information faster The Xilinx kernel does not support tracepoints required by the helper module Automatically detect kernels with address space randomization The Xilinx kernel does not use the address space randomization 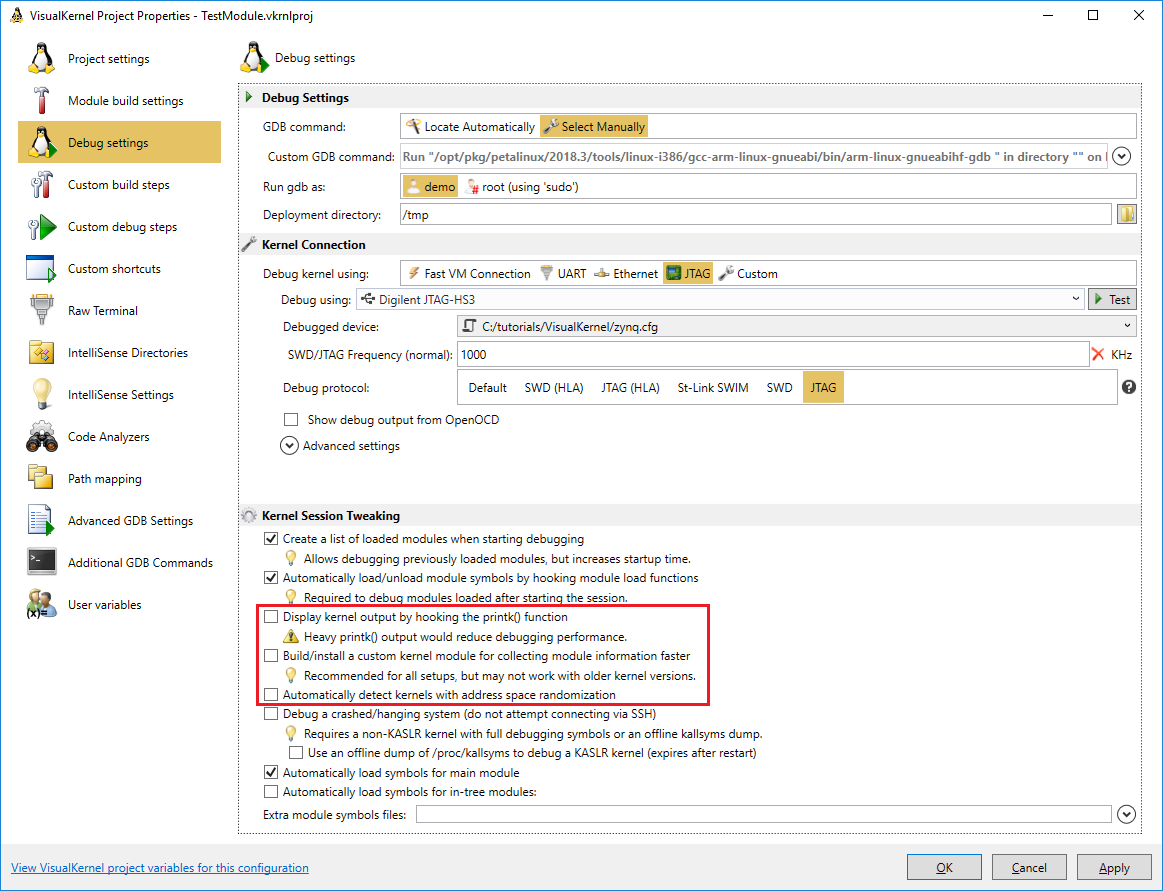
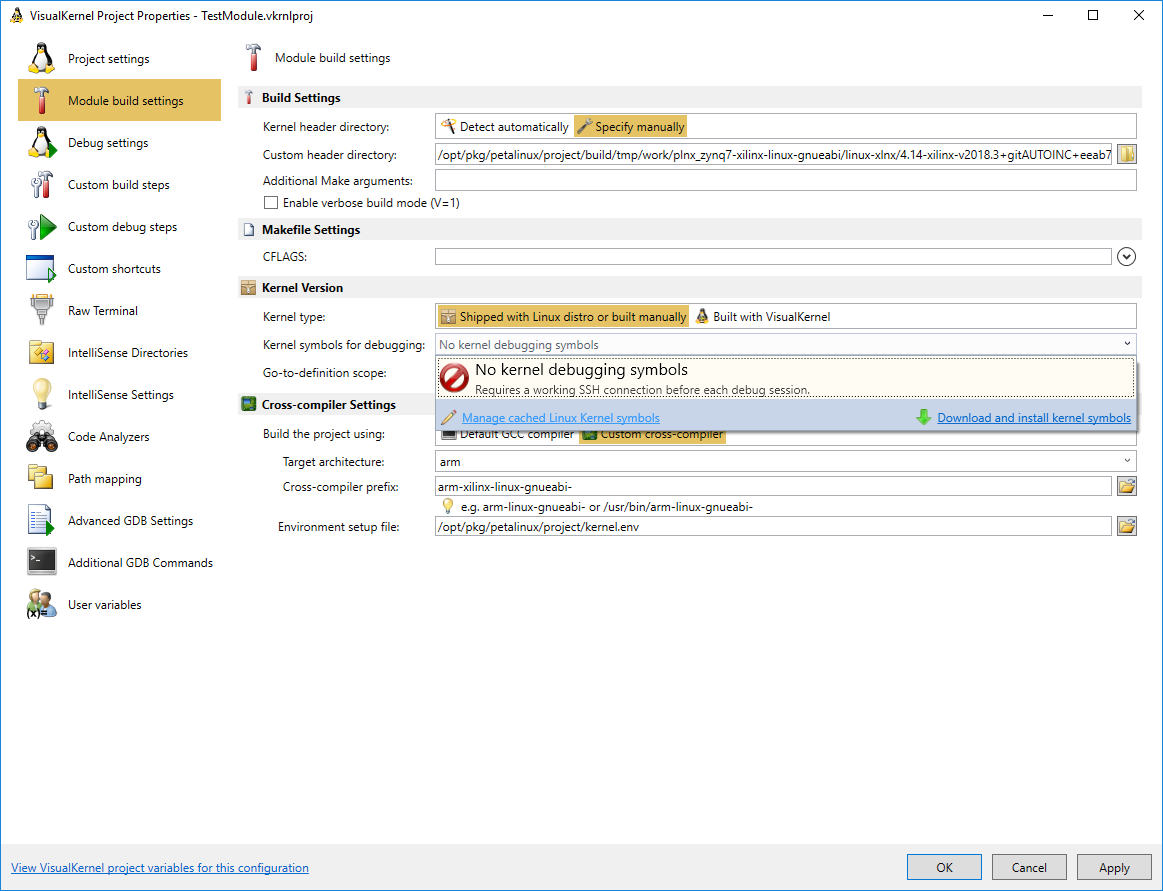
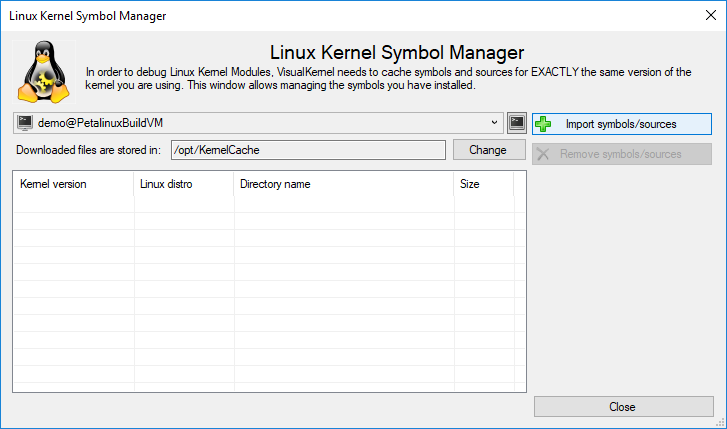
- Go to the Module Build Settings page, open the Kernel Symbols for Debugging selector and click “Manage cached Linux symbols”:
- Select the machine where you have Petalinux tools installed and click “Import symbols/sources”:
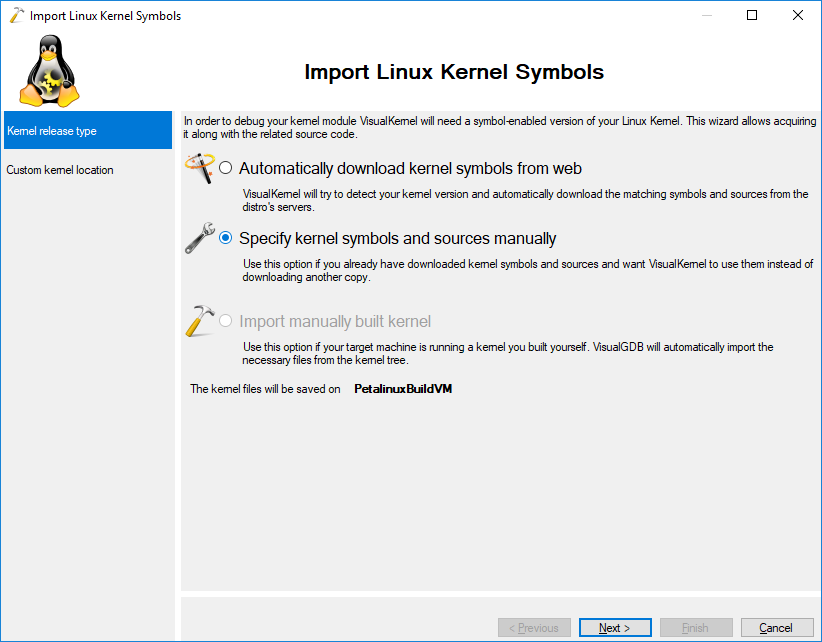
- In the import wizard select “Specify kernel symbols and sources manually”:
- On the second page enter the following settings per this tutorial:
Setting Reason Kernel file with symbols Full path to the vmlinux file built by Petalinux Source directory Kernel source directory used by Petalinux (typically <build directory>/source) Compatible GDB binary Full path to the GDB binary used by Petalinux 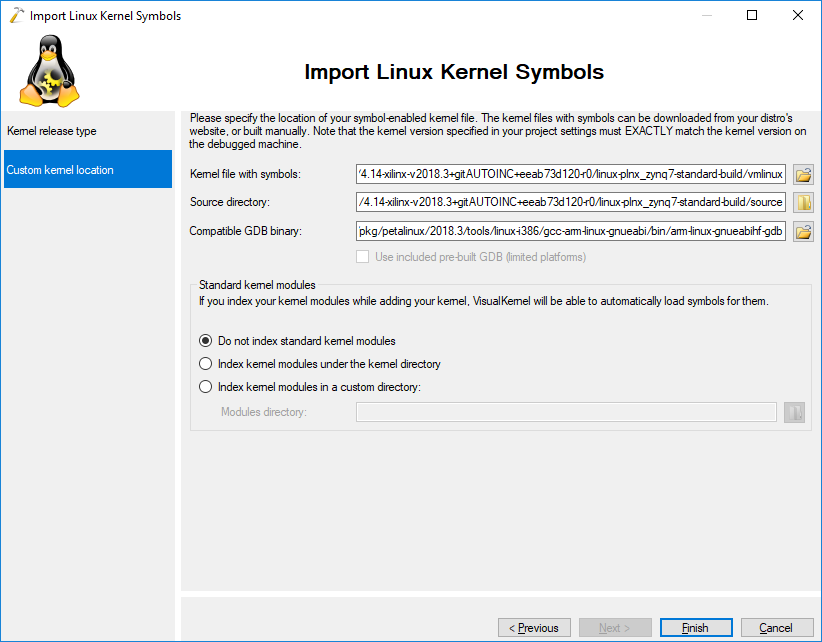
- Once the symbols have been imported, ensure they are selected in the VisualKernel Project Properties:
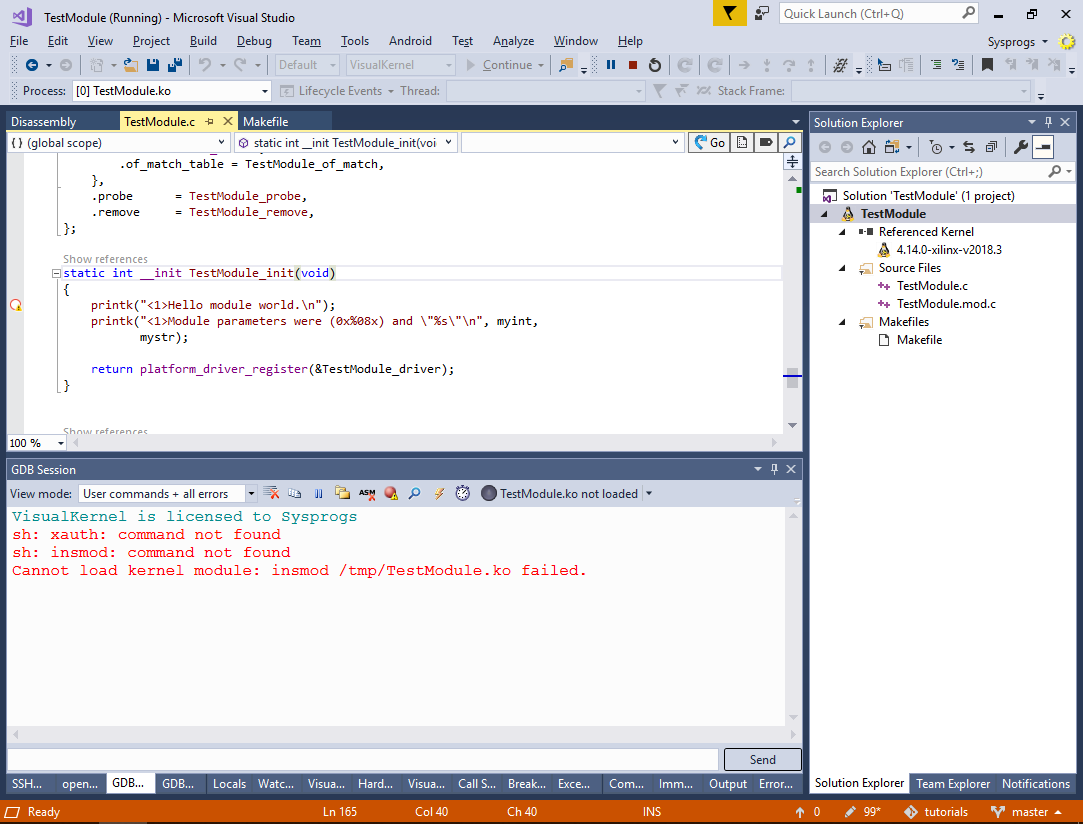
- Now you can try debugging the project, however VisualKernel will normally fail to load the module because the insmod tool is located in /sbin that is not listed in the regular PATH variable:
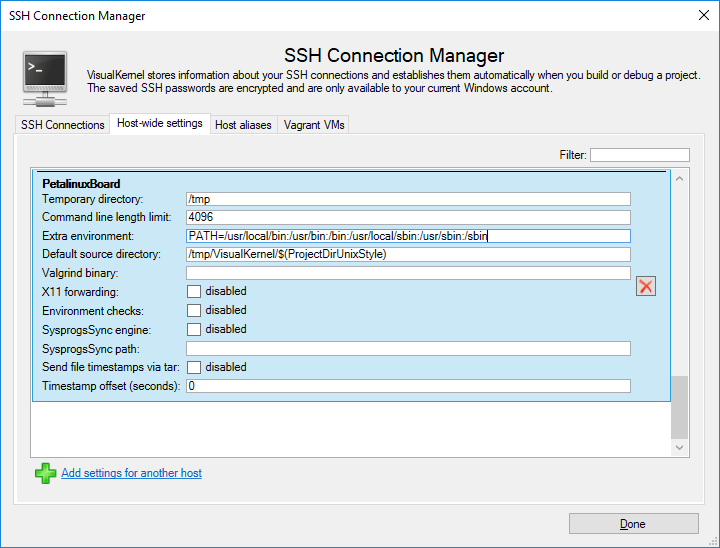
- You can work around it by running “echo $PATH” from an interactive SSH or serial port session on the target and setting it via Tools->VisualKernel->SSH Host Manager->Host-wide settings:
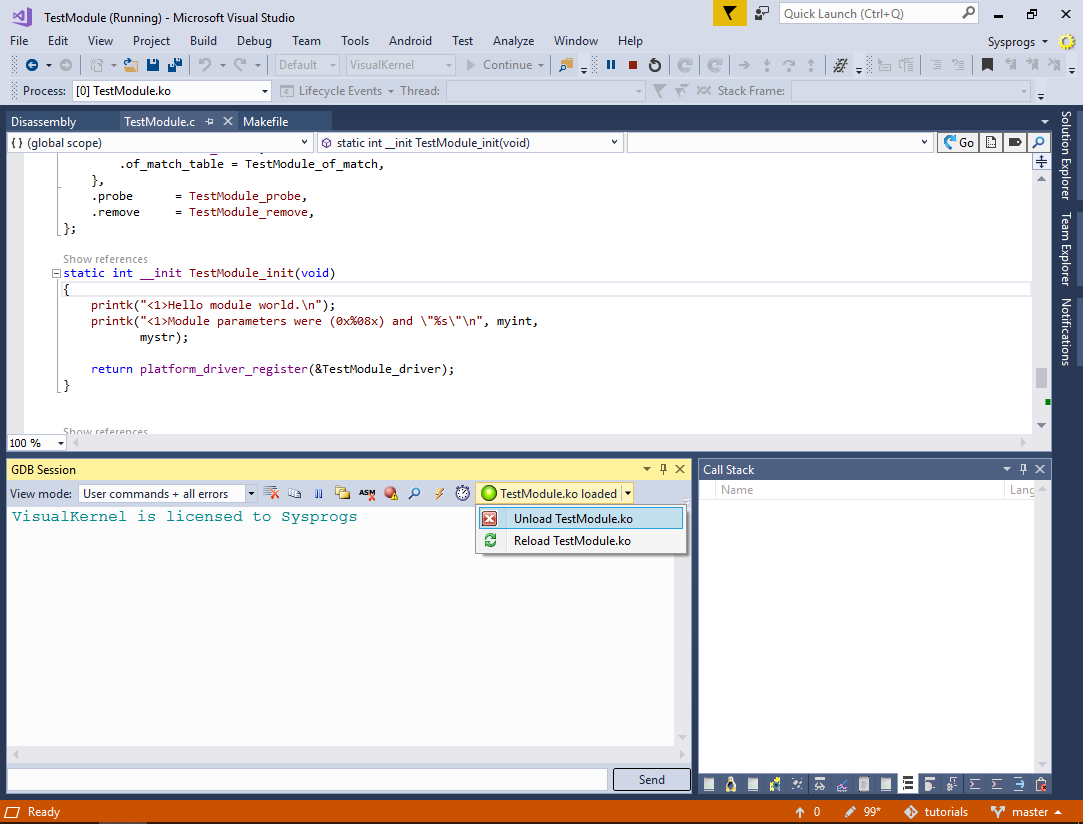
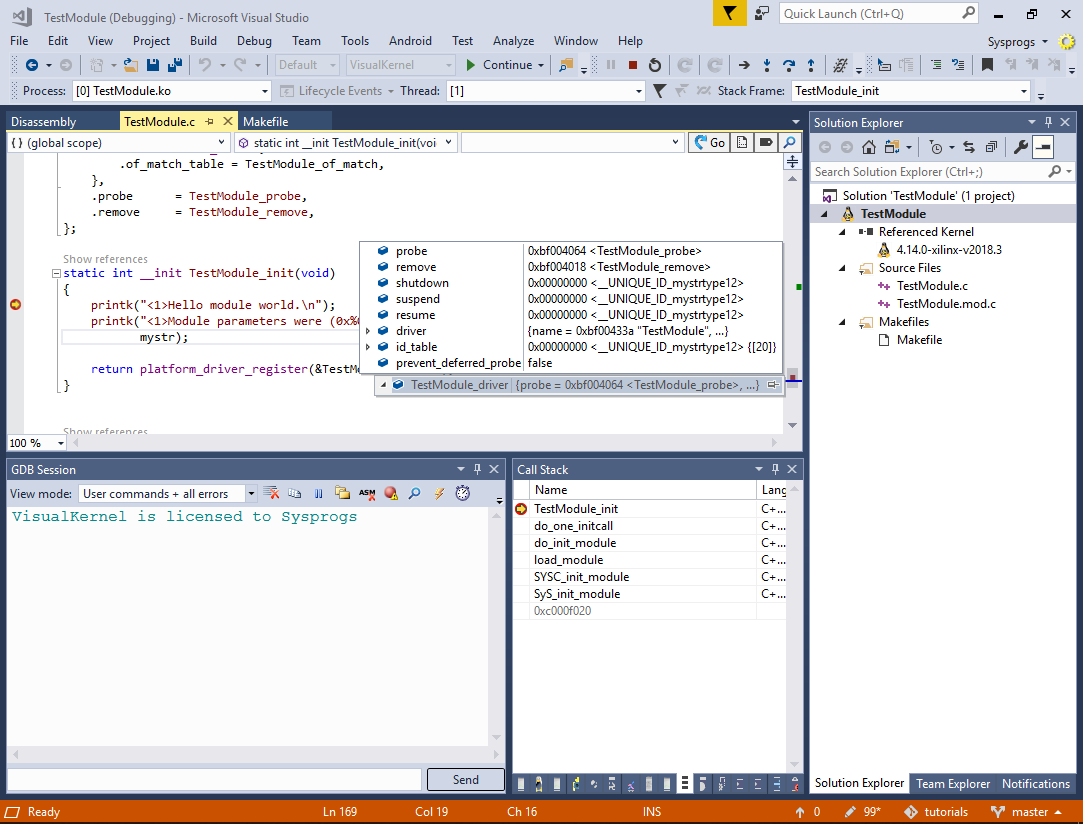
- Now you can start debugging and VisualKernel will be able to load your kernel module and handle breakpoints inside it:
- Use the GDB Session window to load/unload the module as you go: