Preparing Petalinux Kernels for Debugging with VisualKernel
This tutorial shows how to prepare a kernel built with the Petalinux tools for importing it into VisualKernel and creating kernel modules for it. We will start with a basic Petalinux project, modify its settings to support debugging and will show the parameters necessary to import the kernel into VisualKernel.
In order to debug the Petalinux-based kernel from VisualKernel, we will need to perform the following modifications:
- Enable debug symbol generation so that the debugger can step through the kernel source and unwind stack traces.
- Disable the memory protection attributes on the code sections of the kernel and modules, so that VisualKernel can set software breakpoints there.
- Modify the kernel build scripts to dump the environment variables set by Petalinux so that VisualKernel can automatically configure IntelliSense.
- Finally build the kernel with the new settings
In the rest of this tutorial we will provide detailed steps on accomplishing the tasks above.
- Ensure you have a Linux-based machine (or a VM) where you can run the Petalinux tools. Download and install the tools from the Xilinx website and copy your Petalinux project to the same machine.
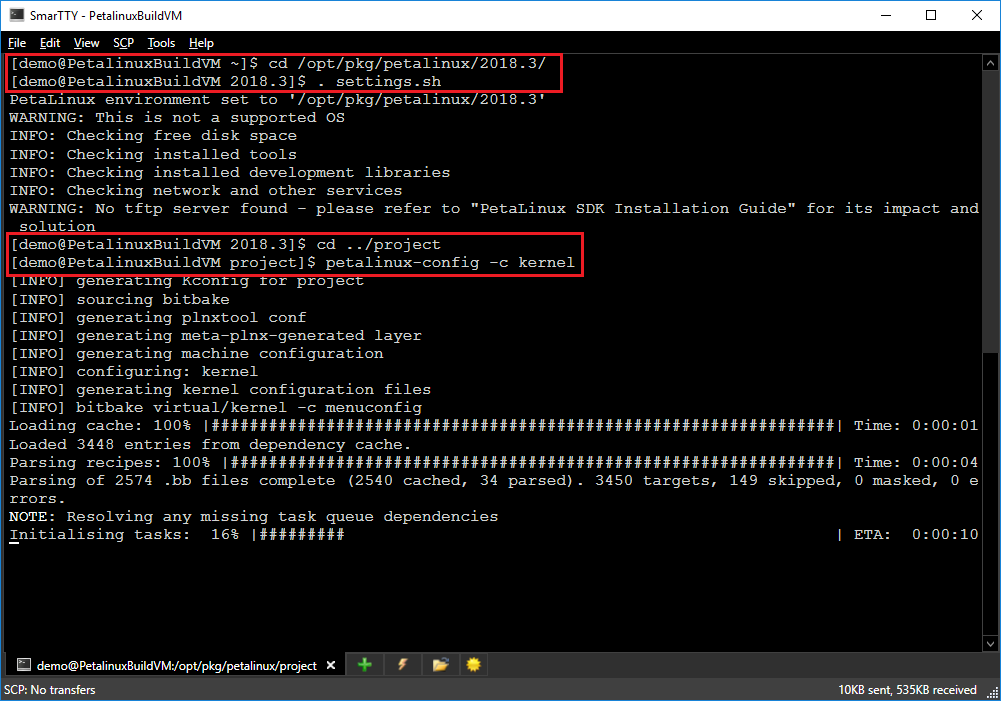
- Connect to the build machine via SSH and run the following commands:
cd <Petalinux tools directory>
. settings.sh
cd <Petalinux project directory>
petalinux-config -c kernel
This will start the process of downloading and configuring a Linux kernel:
- Once the necessary files are downloaded, you will see the kernel configuration menu:
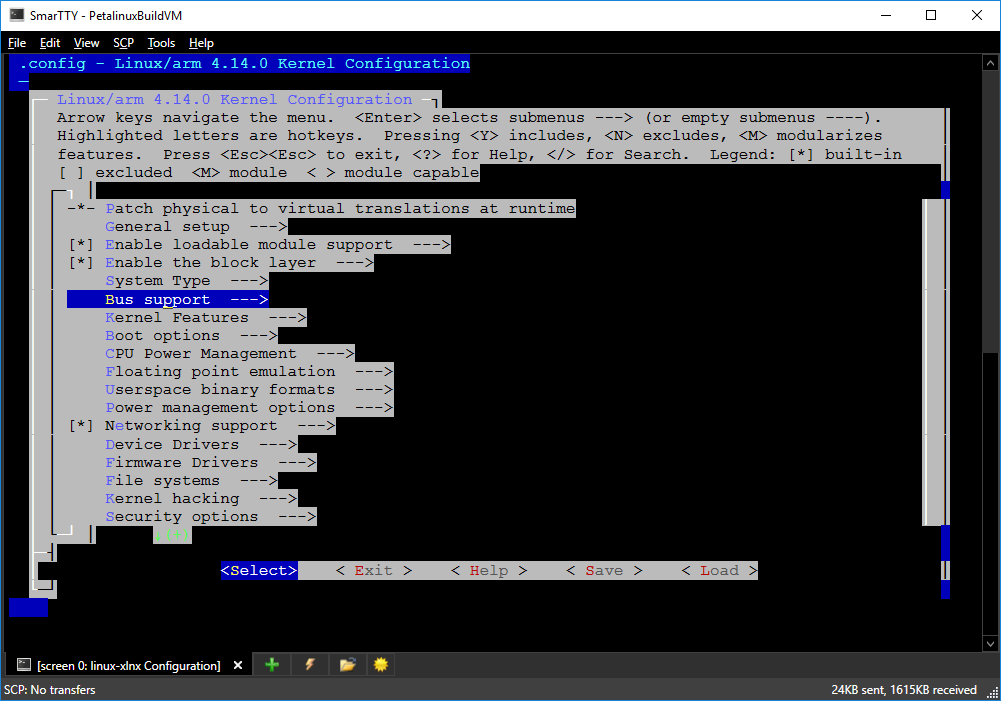
Note that as of March 2019, the Petalinux menu background appears distorted when accessed from Windows SSH clients. This does not affect the functionality. - Enable the Kernel hacking -> Compile-time checks and compiler options -> Compile the kernel with debug info setting in the menu, but do not close it yet:
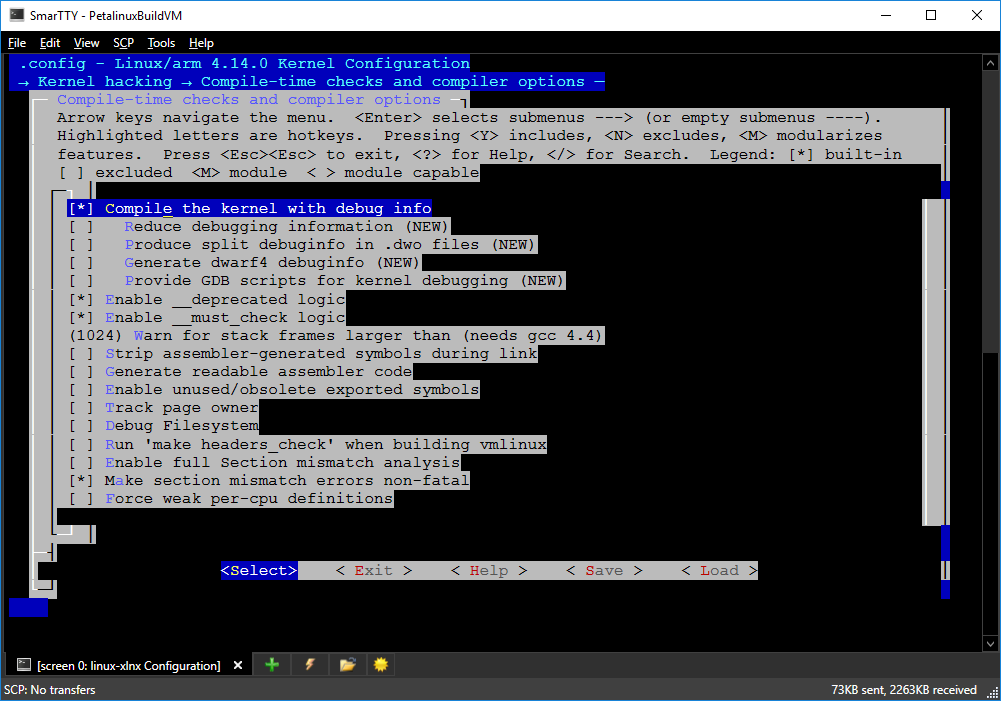
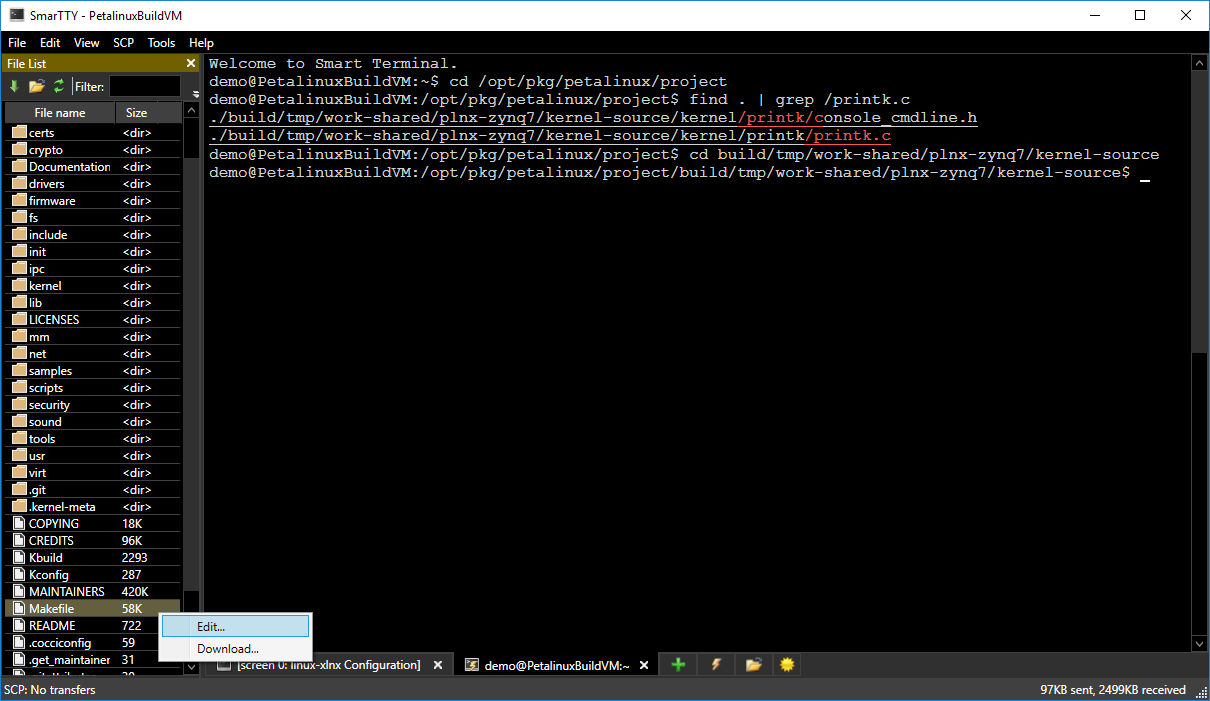
Once you close the menu, the Petalinux tools will delete the Linux kernel source files, so if we want to modify them to disable memory protection and support environment dumping, we need to do it while the menu is open, obtain a patch file and integrate it into the Petalinux project. - In another tab go to your Petalinux project directory (not the Petalinux tools directory) and run the following command:
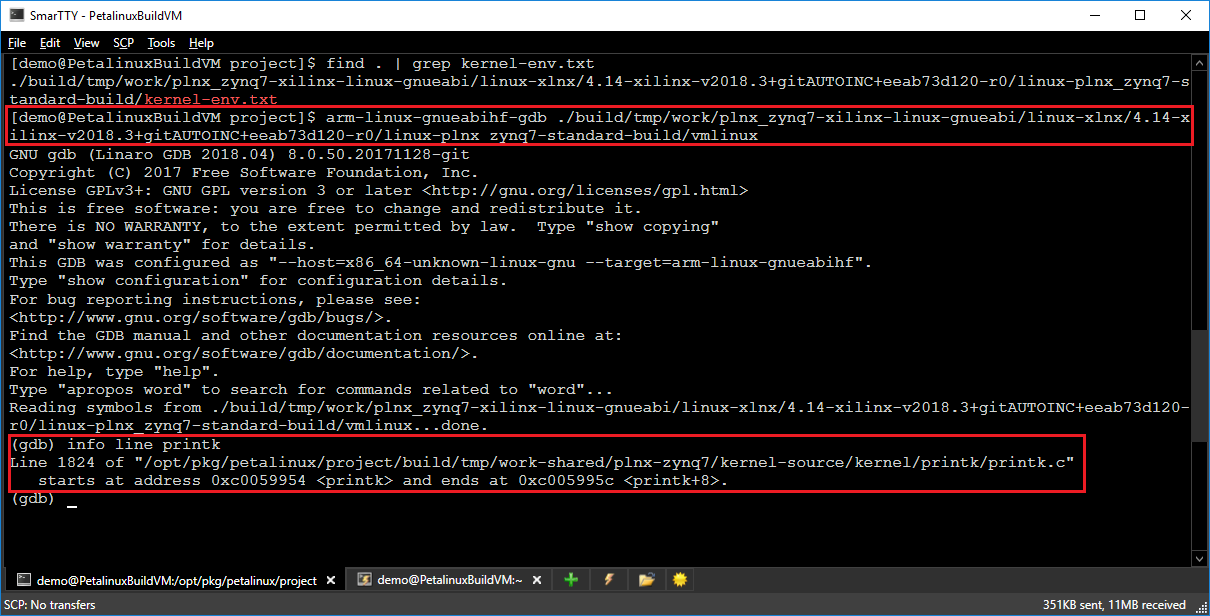
find . | grep /printk.c
This will help locate the directory where the Linux kernel sources have been deployed. Go to the parent directory, locate the Makefile in it and open it in a text editor:
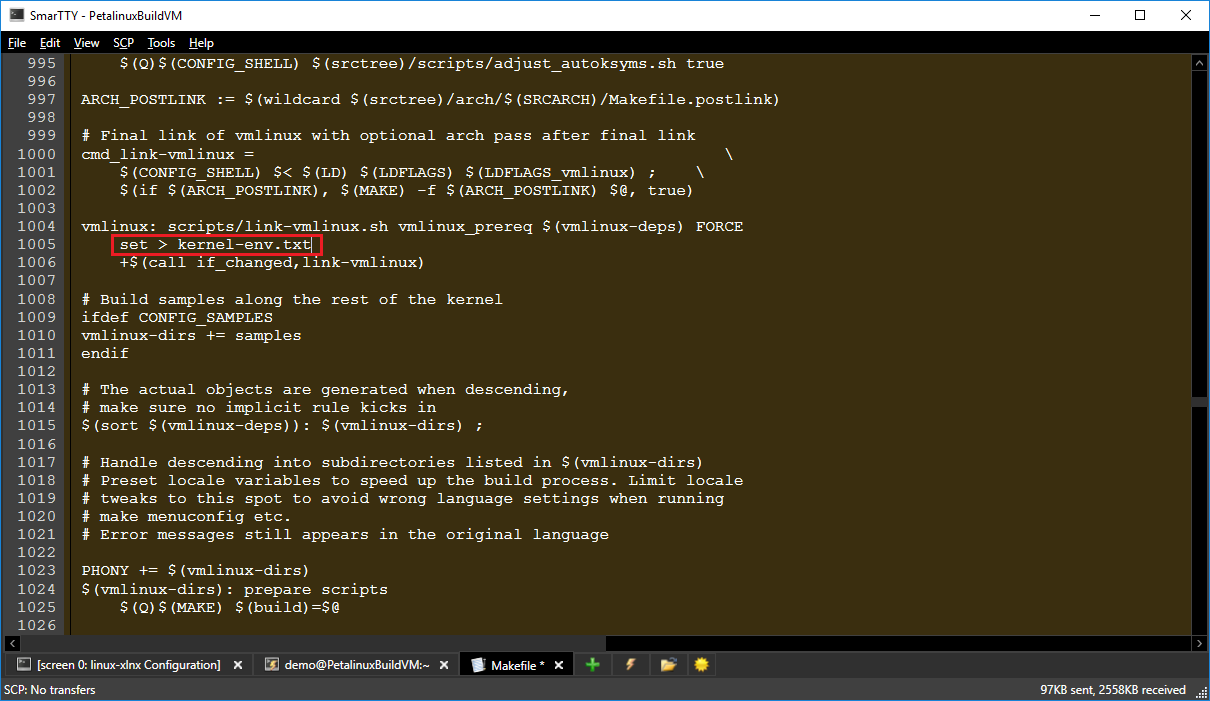
- Locate the recipe for the vmlinux target and add the following line to it:
<TAB>set > kernel-env.txt
- Now open the arch/arm/KConfig file and comment the lines setting the ARCH_HAS_STRICT_KERNEL_RWX and ARCH_HAS_STRICT_MODULE_RWX parameters:
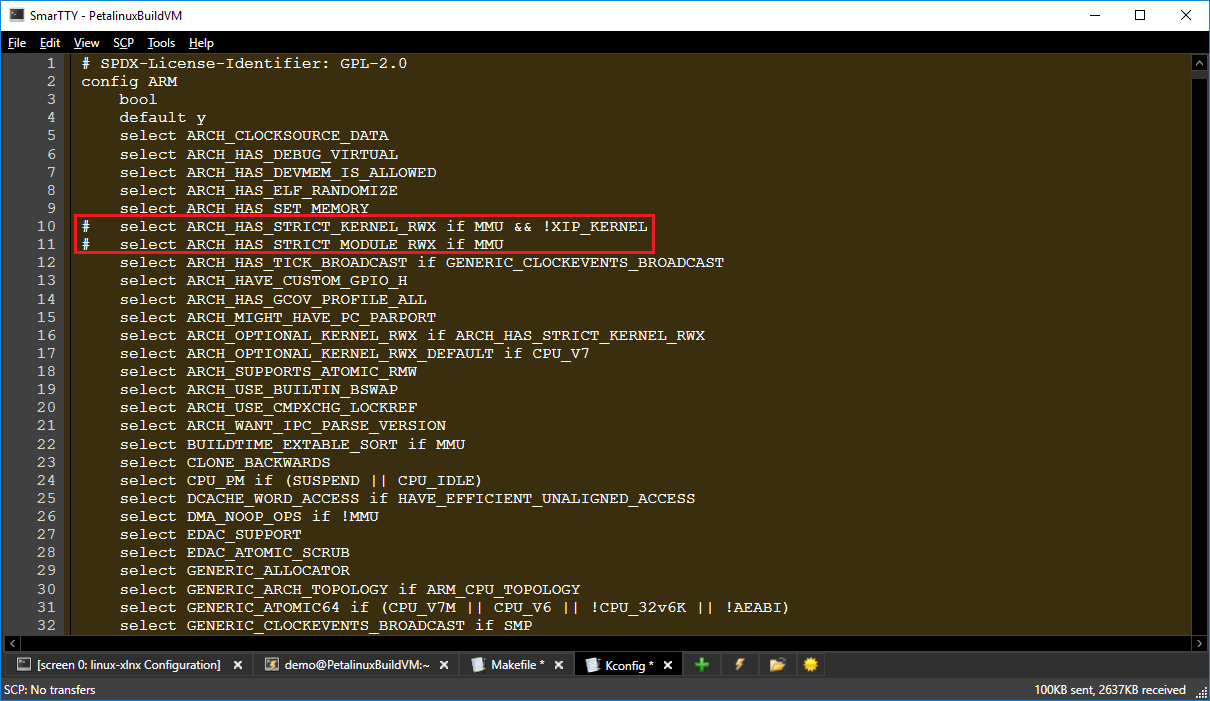
This will allow software breakpoints (not limited to hardware breakpoint registers) inside the kernel and the modules, however would decrease the overall kernel security. Hence we only recommend to keep this option during debugging. - Now we need to configure Petalinux to apply our changes to the kernel each time it is built. Run the following commands from the kernel source directory:
git commit -a -m "Prepared for debugging with VisualKernel"
git format-patch -1
mkdir -p <Petalinux Project Directory>/project-spec/meta-user/recipes-kernel/linux/linux-xlnx
cp 0001-Prepared-for-debugging-with-VisualKernel.patch <Petalinux Project Directory>/project-spec/meta-user/recipes-kernel/linux/linux-xlnx
This will create a patch file that can be automatically applied to the Linux kernel.
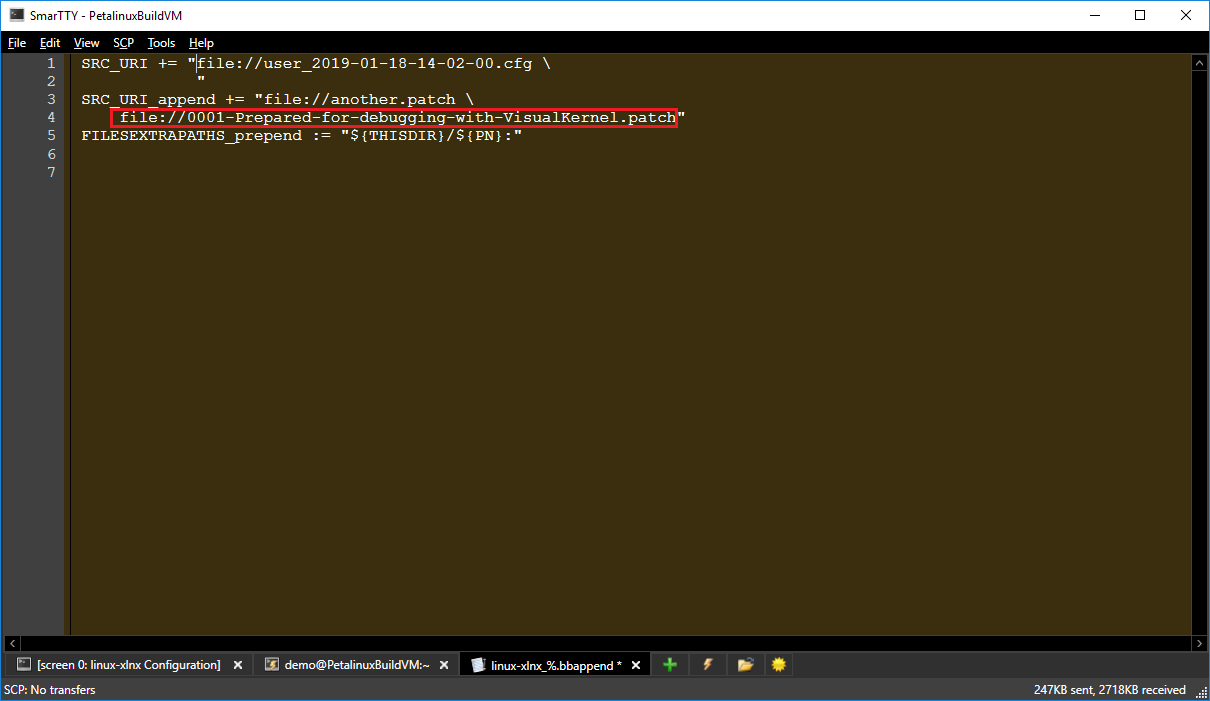
- Finally, open the <Project Directory>/project-spec/meta-user/recipes-kernel/linux/linux-xlnx_%.bbappend file in a text editor (create it if it’s missing) and ensure it mentions the patch file as shown below:
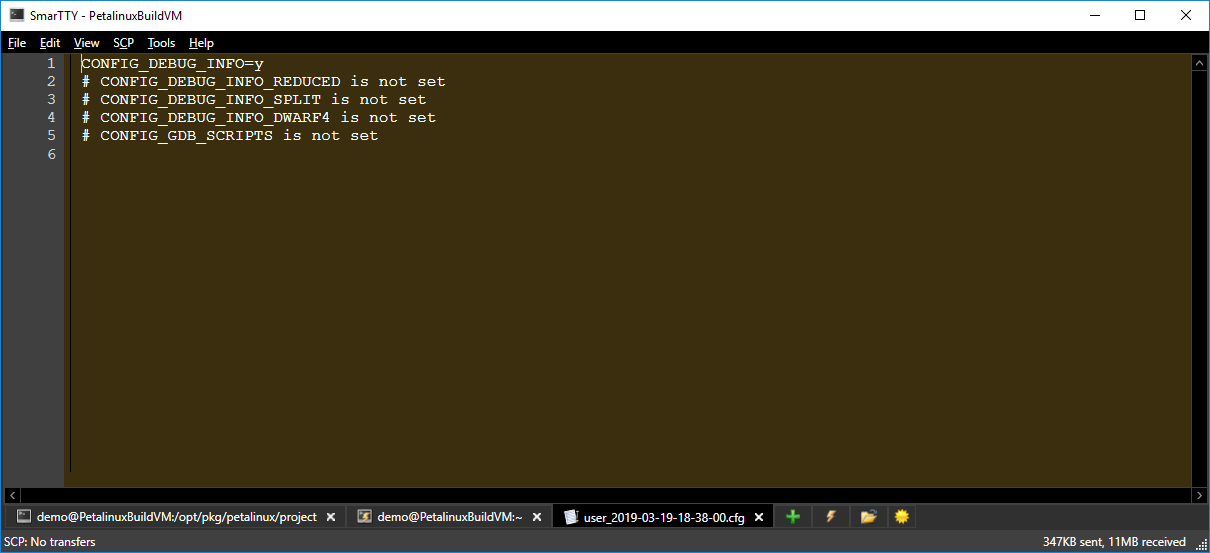
- Go back to the tab where you ran petalinux-config, save the changes and close the configuration menu. Once the command exits, re-open the linux-xlnx_%.bbappend file and locate the last .cfg file listed in the SRC_URI statement. This file will contain the configuration changes we made through the menu. Ensure it contains the “CONFIG_DEBUG_INFO=y” line as otherwise the debug symbols will not be generated:
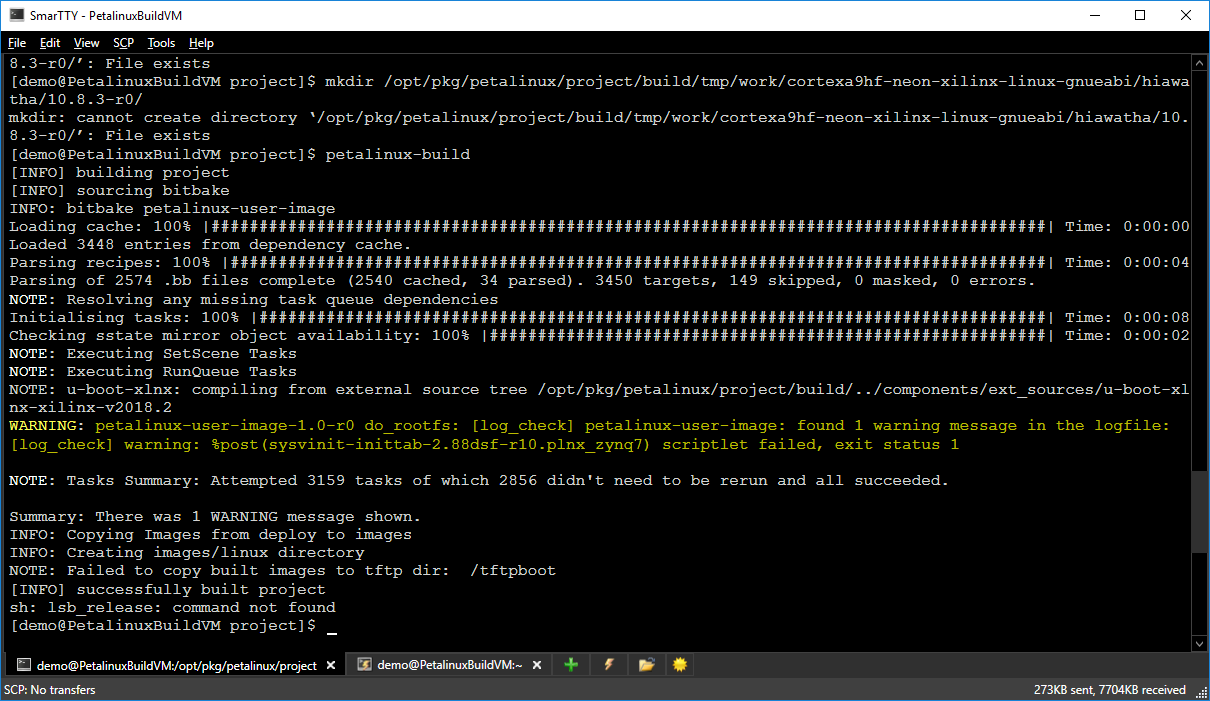
- Now you can start building the Petalinux project. Go to the project directory (ensure you use the shell where you ran . settings.sh) and run the following command:
petalinux-build
- Wait for the build to complete. You can ignore the “missing lsb_release” and “failed to copy built images to tftp dir” errors:
- Now we will need to locate the kernel-env.txt file produced by our modified build scripts. Run the “find . | grep kernel-env.txt” command in the project directory and take a note of the output. Then run the following command from the project directory:
sed -e 's/^\(AS\|AR\|NM\|CPP\|PATH\|LD\|CCLD\|STRIP\|CXX\|OBJCOPY\|ARCH\|
RANLIB\|CROSS_COMPILE\|CC\|READELF\|OBJDUMP\|TARGET_CFLAGS\|PETALINUX_.*
\|KERNEL_.*\)=\(.*\)/export \1=\2/;t;d' < [full path to kernel-env.txt] > kernel.env
This will convert the dump from the ‘set’ command into a shell script that can be loaded using the ‘.’ command.
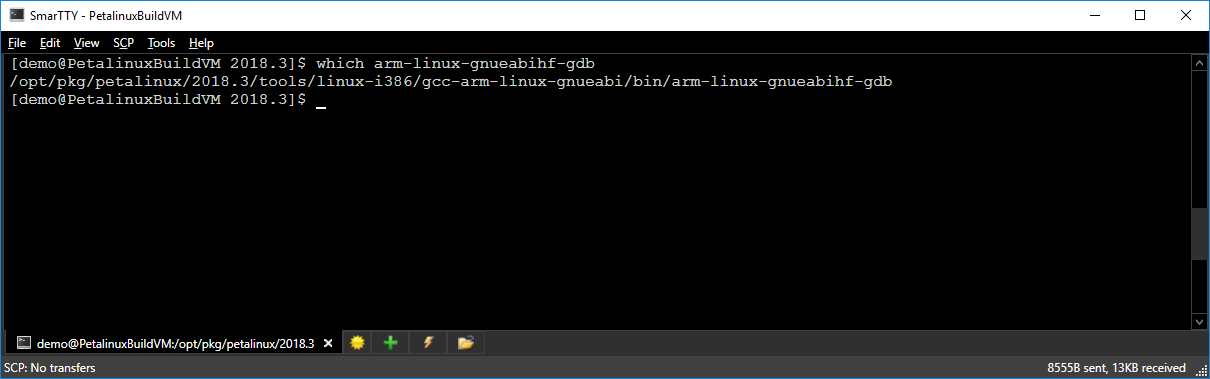
- Locate the full path to the GDB executable provided by the Xilinx tools by running “which arm-linux-gnueabihf-gdb”:
- Finally, open the vmlinux file from the directory of the kernel-env.txt file with gdb and ensure it contains symbols by running the “info line printk” command:
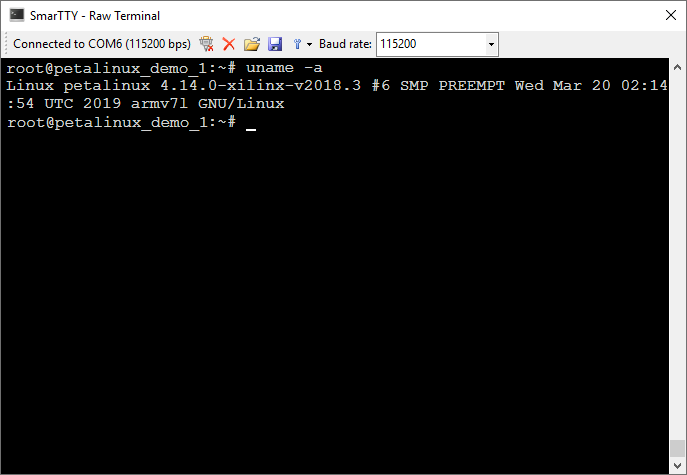
- Ensure you can boot into the new kernel. Typically, copying the image.ub file (the exact name is different for different boards) to the SD card should be sufficient. You can check the version of the kernel running on the device by running the “uname -a” command on it (not on the build machine):
- Now we are ready to import the kernel into VisualKernel. Take a note of the following paths from your setup as you will need them to configure VisualKernel later:
Path Sample value Petalinux project directory /opt/pkg/petalinux/project Kernel environment file /opt/pkg/petalinux/project/kernel.env Kernel image with symbols /opt/pkg/petalinux/project/build/tmp/work/plnx_zynq7-xilinx-linux-gnueabi/linux-xlnx/4.14-xilinx-v2018.3+gitAUTOINC+eeab73d120-r0/linux-plnx_zynq7-standard-build/vmlinux Kernel source directory /opt/pkg/petalinux/project/build/tmp/work/plnx_zynq7-xilinx-linux-gnueabi/linux-xlnx/4.14-xilinx-v2018.3+gitAUTOINC+eeab73d120-r0/linux-plnx_zynq7-standard-build/source GDB executable /opt/pkg/petalinux/2018.3/tools/linux-i386/gcc-arm-linux-gnueabi/bin/arm-linux-gnueabihf-gdb
Follow this tutorial to create a basic kernel module for the Petalinux-based kernel using VisualKernel.