Creating a basic Linux Kernel Module with Visual Studio
This tutorial shows how to create, build and debug a basic Linux kernel module with Visual Studio and VisualKernel. Before you begin, install VisualKernel 3.0 or later and ensure you have a Linux machine running a recent version of the Linux kernel.
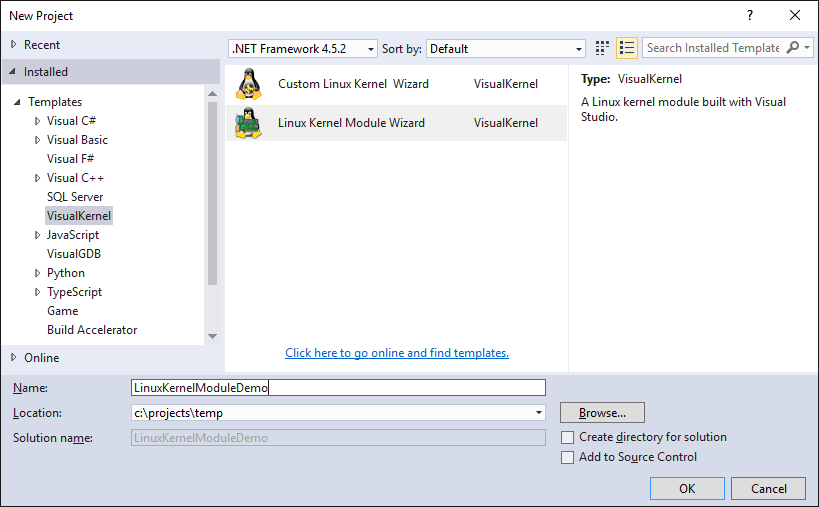
- Start Visual Studio and open the VisualKernel Module project wizard:
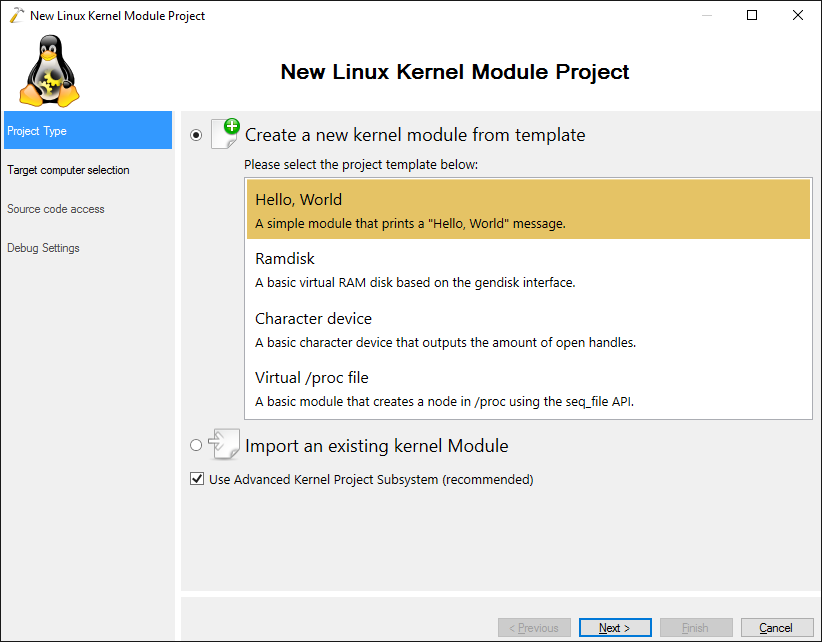
- Proceed with the default “Create a new kernel module from template” option. For better performance and more accurate IntelliSense we recommend selecting the Advanced Kernel Project Subsystem:
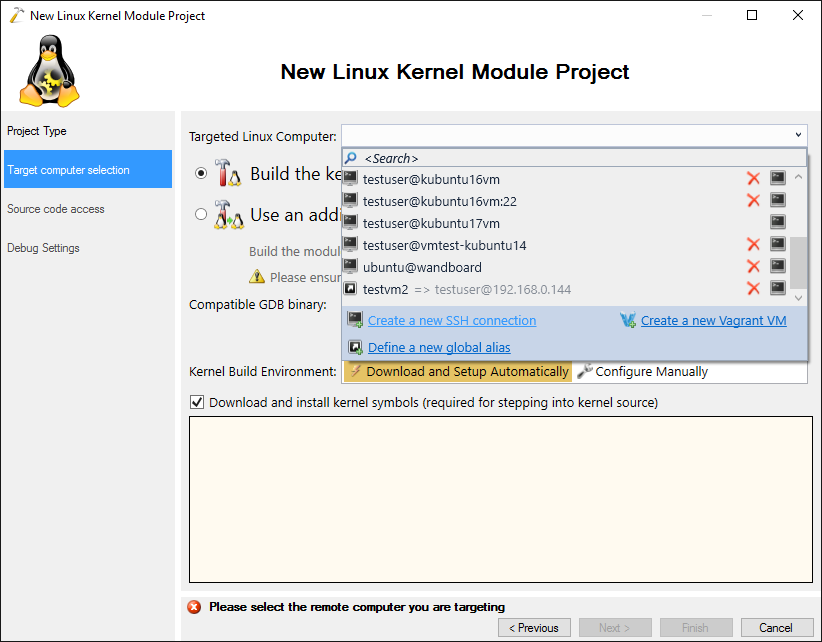
- Select your Linux machine in the “Targeted Linux Computer” field. If you have not used that machine with VisualKernel before, click “Create a new SSH connection”:
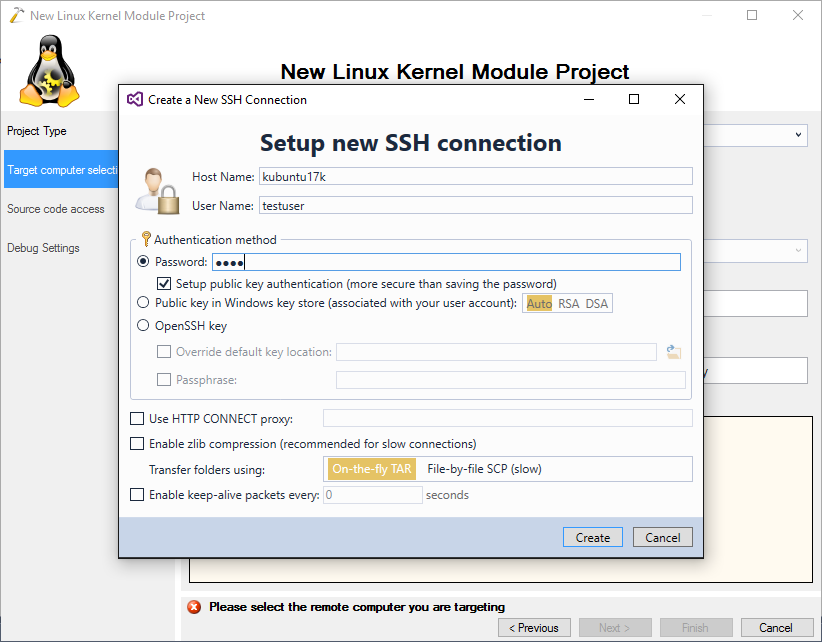
- If you are creating a new SSH connection, ensure you use the user that can run commands as root via sudo, as otherwise VisualKernel won’t be able to load your kernel module:
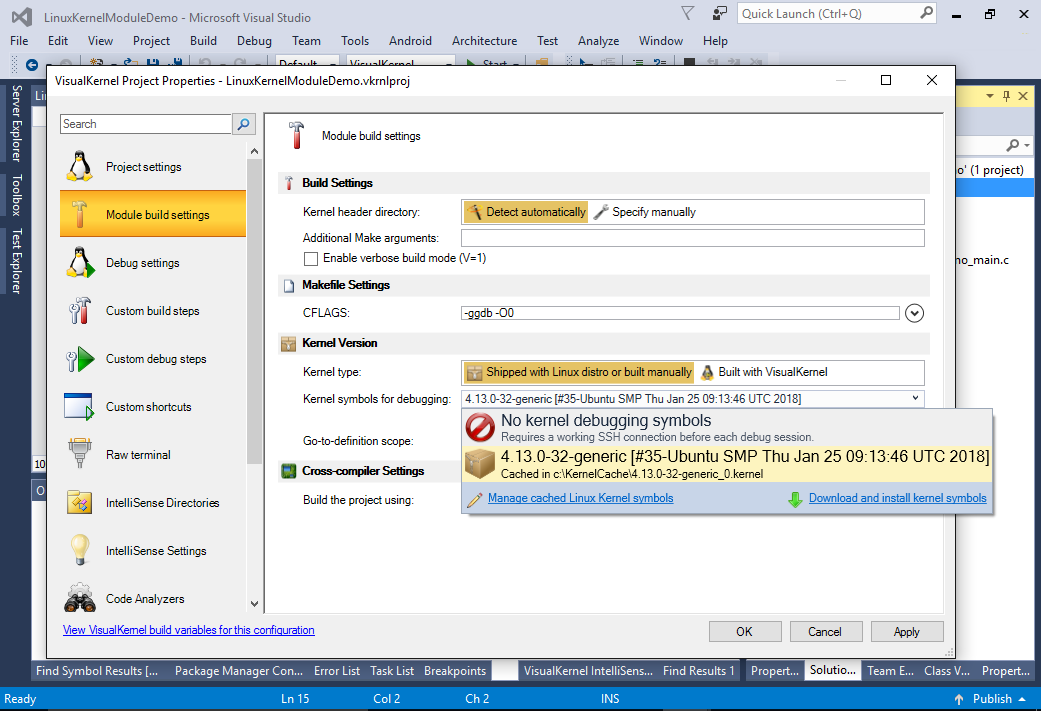
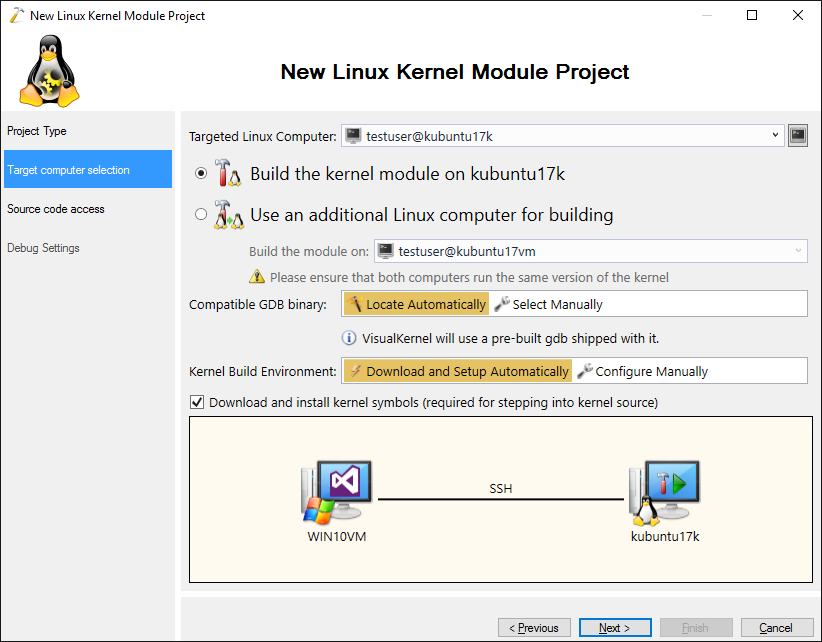
- Ensure that the “Download and install kernel symbols” checkbox is checked. Kernel symbols are not strictly required when debugging kernel modules, however installing them will greatly improve the debugging usability by showing the source code of the kernel functions, stepping through them and allowing to explore it via Code Map:
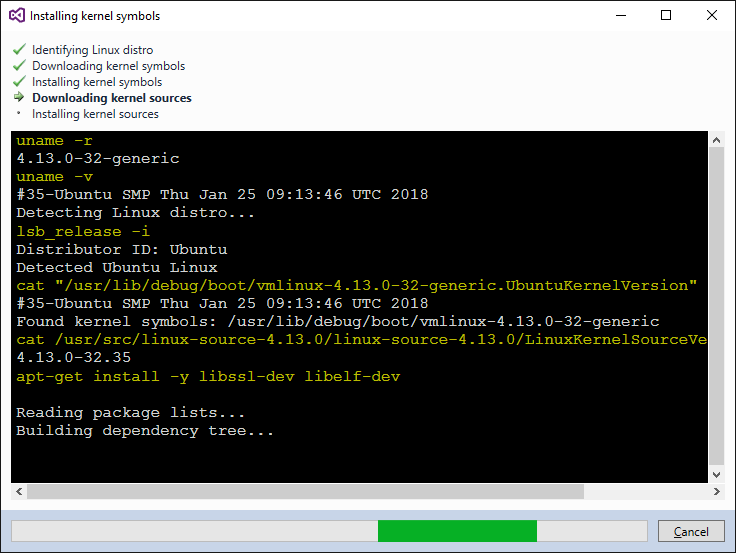
- Press “Next”. VisualKernel will automatically download and install the kernel symbols for most common Linux distros:
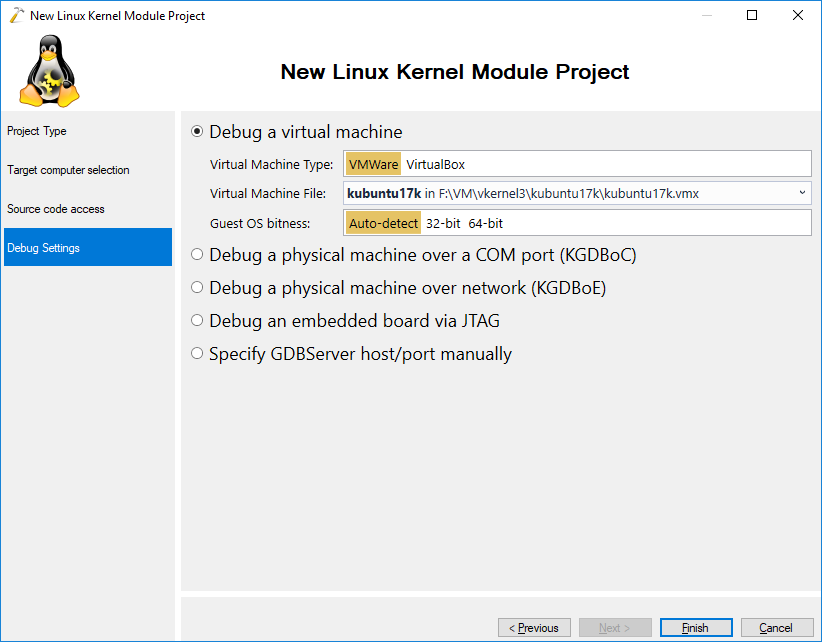
- On the last page of the wizard select your debug settings. If your module does not directly interact with the hardware, we recommend using VMWare with the VMWare-specific debug connection. It utilizes a high-performance gdb stub that runs inside VMWare (and outside the Linux kernel) and is much more stable than debug methods provided by the kernel itself. For embedded ARM-based boards we recommend using JTAG as the debug method:
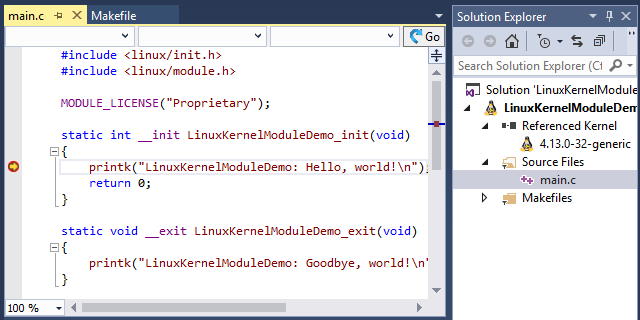
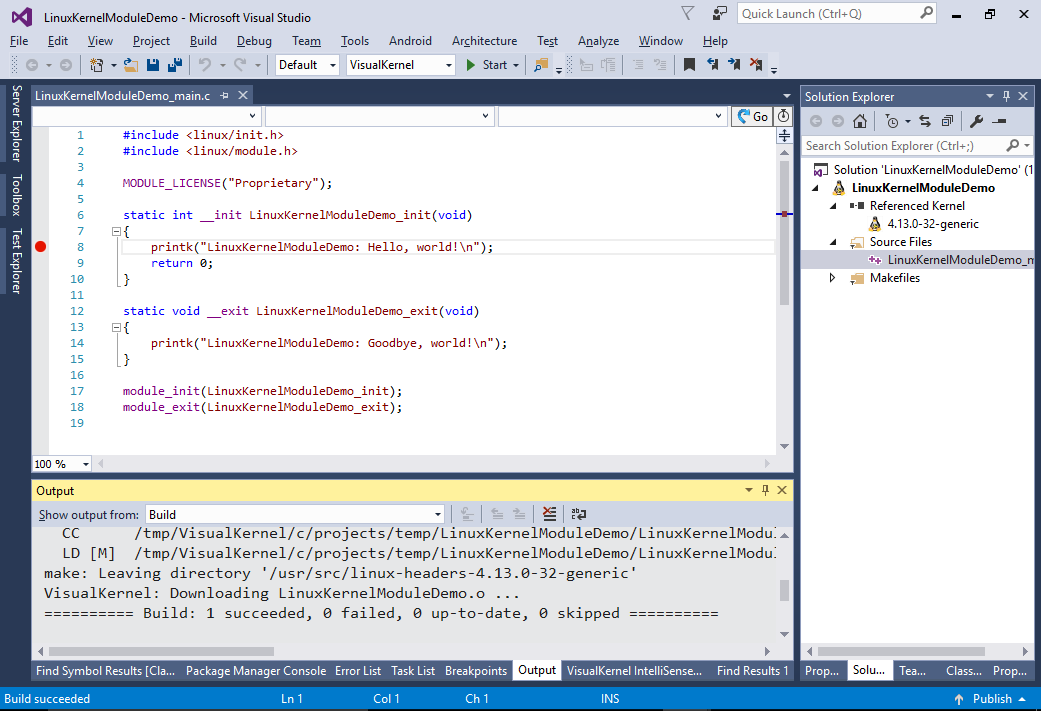
- Press “Finish” to create the project. Build it via Ctrl-Shift-B:
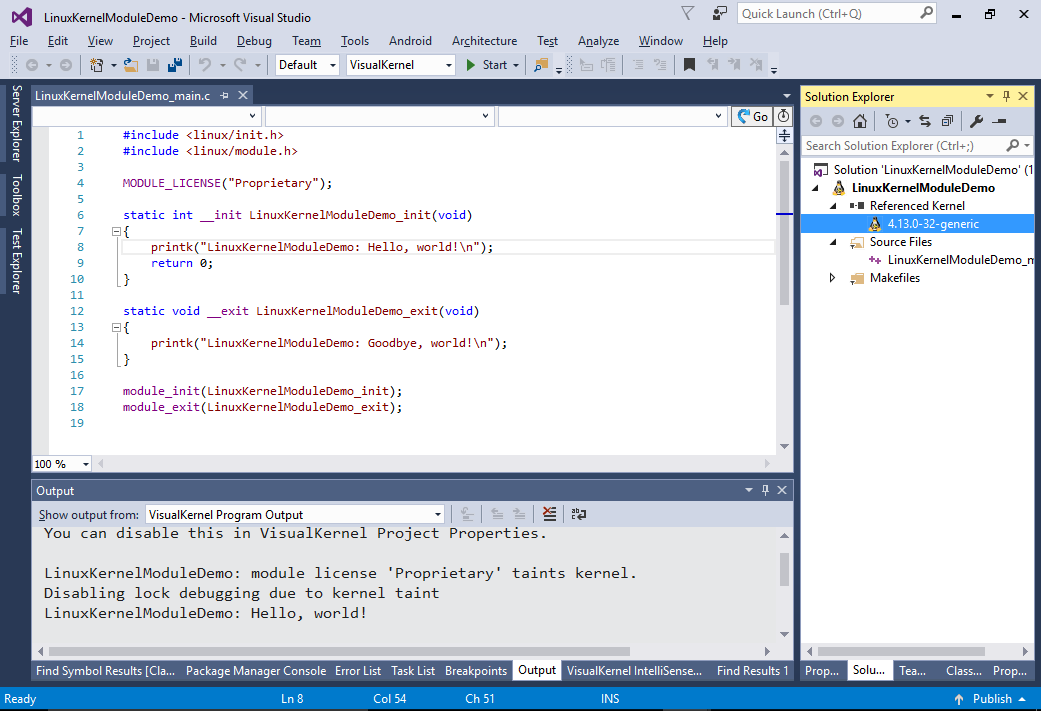
- Set a breakpoint in the init function of your module and press F5 to start debugging the project. VisualKernel will automatically configure your kernel for debugging and will start the debug session. Once the breakpoint is hit, you can debug your module as if it was a regular program:

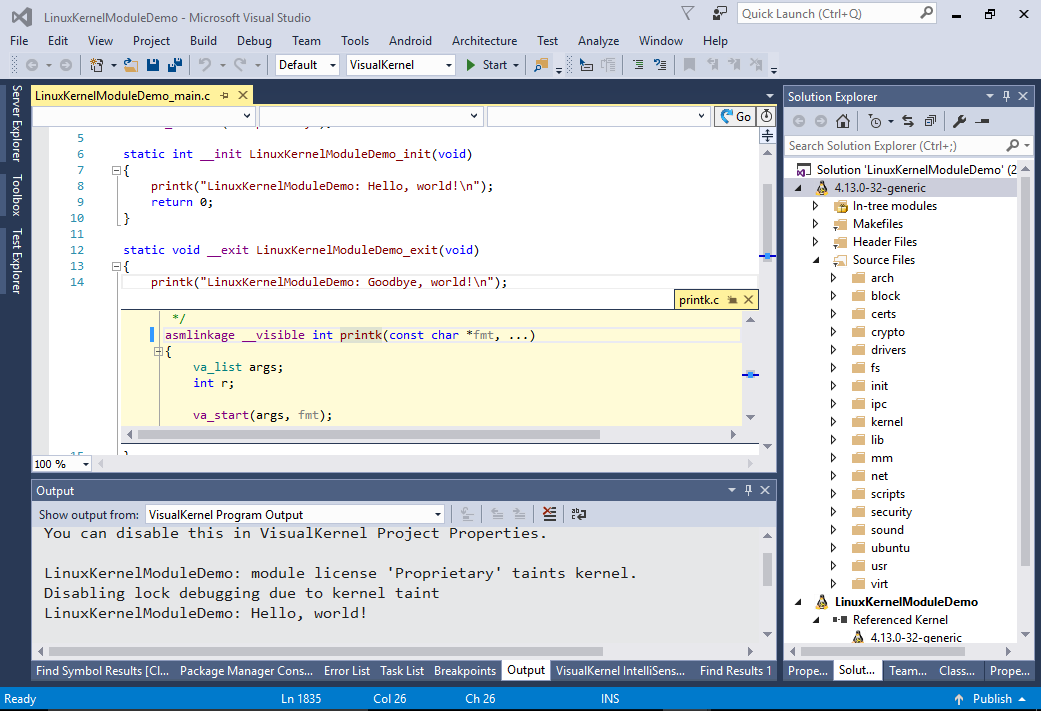
- If you are using the Advanced Kernel Project Subsystem, you can conveniently explore the sources of the kernel itself by locating it in Solution Explorer and double-clicking on it:
- This will create a special kernel release project, store it in your kernel cache directory and add it to Solution Explorer. Once the kernel release project is present in the solution, you can use functions like Go to Definition, Peek Definition and Code Map to explore the kernel sources:
- If you have created the project without downloading the kernel symbols, you can always select them later via the Module Build Settings page of VisualKernel Project Properties: