Debugging Linux Kernel on i.MX6 with JTAG and Visual Studio
This tutorial shows how to easily debug Linux kernel on a multi-core i.MX6 device from NXP/Freescale. We will show how to automatically configure JTAG with VisualKernel and conveniently do multi-core debugging with the Sysprogs OpenOCD fork supporting easy multi-core debugging. Before you begin, install VisualKernel 2.1 or later and build/install a debug-enabled kernel by following this tutorial.
- First of all, connect the JTAG pins on your i.MX6 board to the JTAG debugger. In this example we will use the Olimex ARM-USB-OCD-H debugger and the Wandboard Duo board that has JTAG pins on the side of the smaller board:
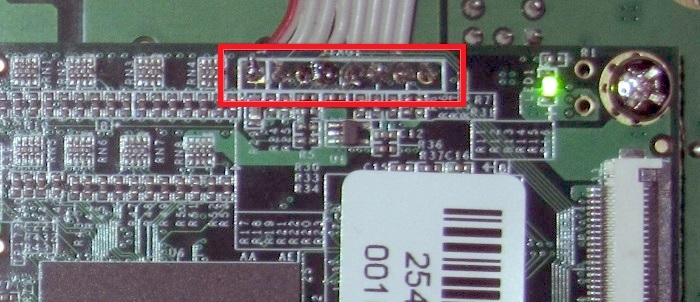 You need to connect the following pins:
JTAG20 Pin number Signal name Wandboard pin number 1 3.3V 1 DO NOT CONNECT (normally 3) nTRST 2 7 TMS 3 5 TDI 4 13 TDO 5 DO NOT CONNECT (normally 15) nSRST 6 9 TCK 7 4 GND 8 Do not connect nTRST and nSRST pins as you don’t want to reset the kernel each time you start a debug session.
The overall setup should look like this: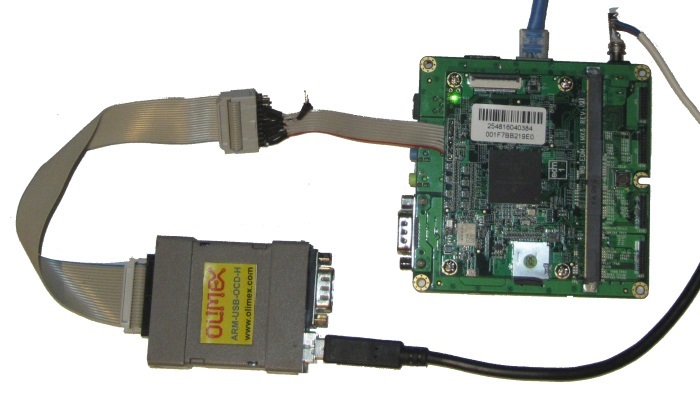
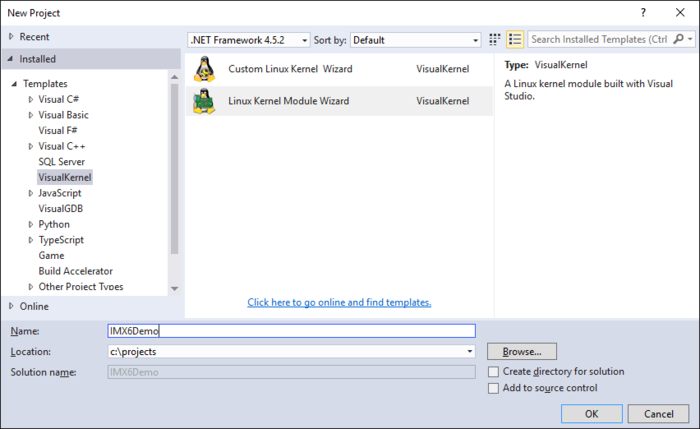
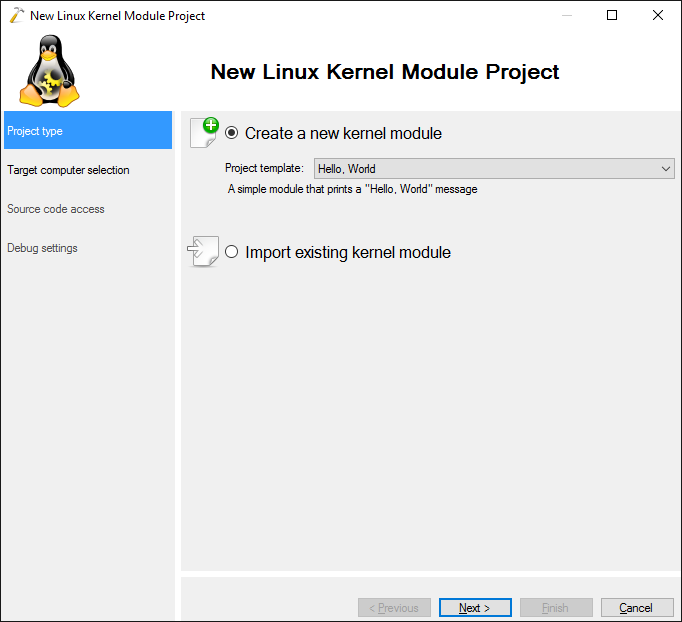
- Open Visual Studio and launch the VisualKernel Linux Kernel Module Wizard:
- Continue with the default “Create a new kernel module” setting:
- Select your i.MX6 board in the “targeted Linux computer” field, then select “Use an additional Linux computer to build the module” and select the Linux machine with the cross-toolchain where you built the kernel as described in this tutorial:
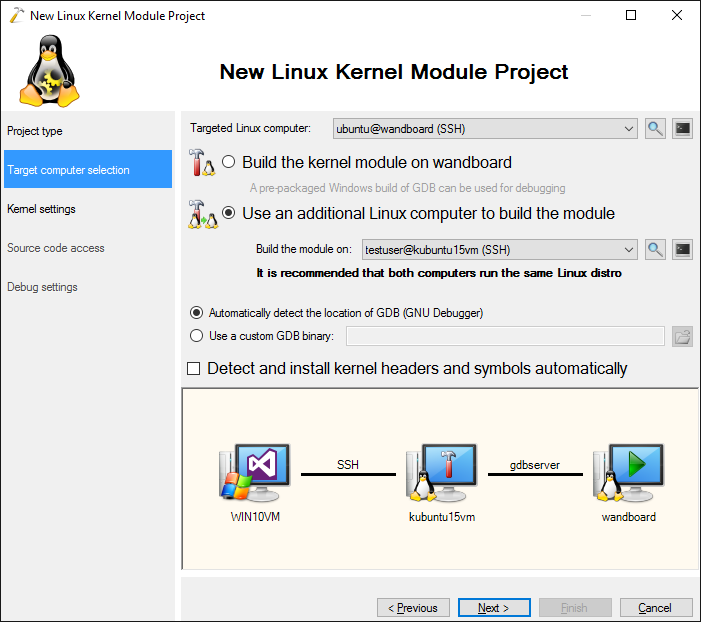 Ensure you also uncheck the “Detect and install kernel headers and symbols” checkbox.
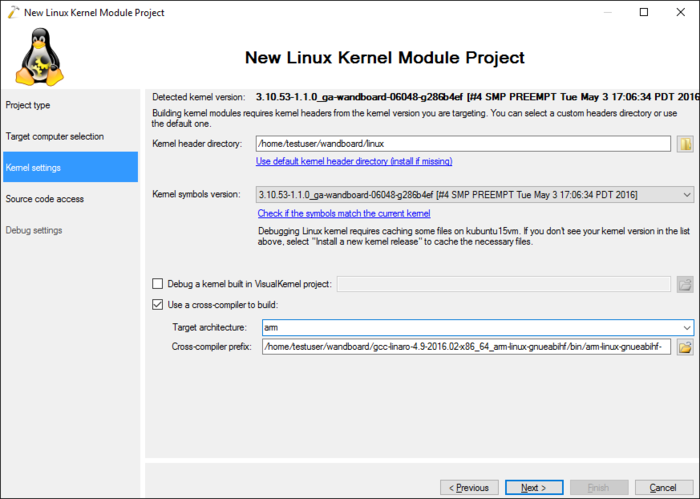
 - The next page will ask you for the details on the kernel you built. Specify the directory with the sources as the kernel header directory, check the “Use a cross-compiler” checkbox and specify target architecture (arm) and a cross-compiler prefix (simply click ‘browse’, locate your gcc binary and VisualKernel will compute the prefix automatically):
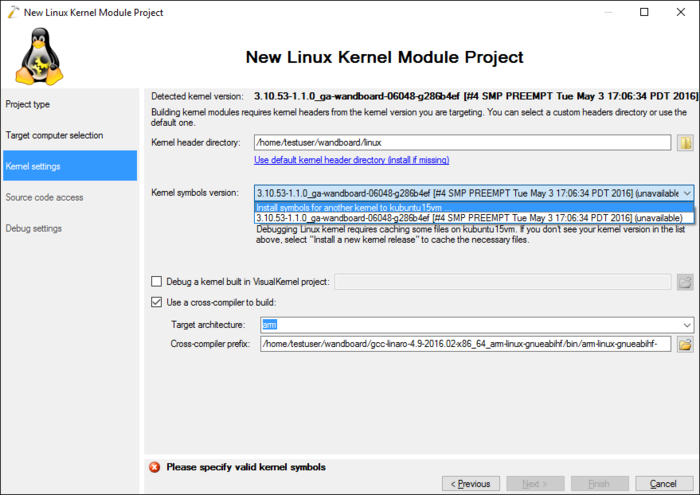 Then select “Install symbols for another kernel” to import the kernel symbols into VisualKernel.
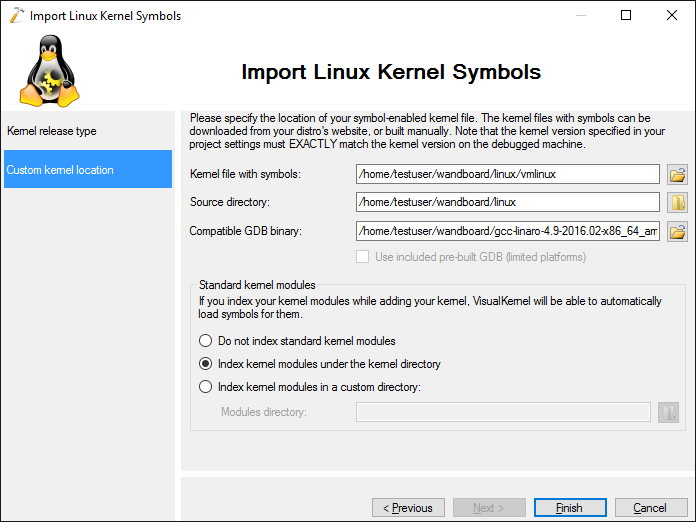
 - The kernel symol import wizard will start. Select “Specify kernel symbols and sources manually”:
- Then point the wizard at your vmlinux file (usually located in the kernel source directory), the source directory itself and the gdb binary from the Linaro cross-toolchain. Press “Finish” to import the symbols:
- Now the Kernel Settings page will look like this:
 Press “Next” to proceed to source code settings.
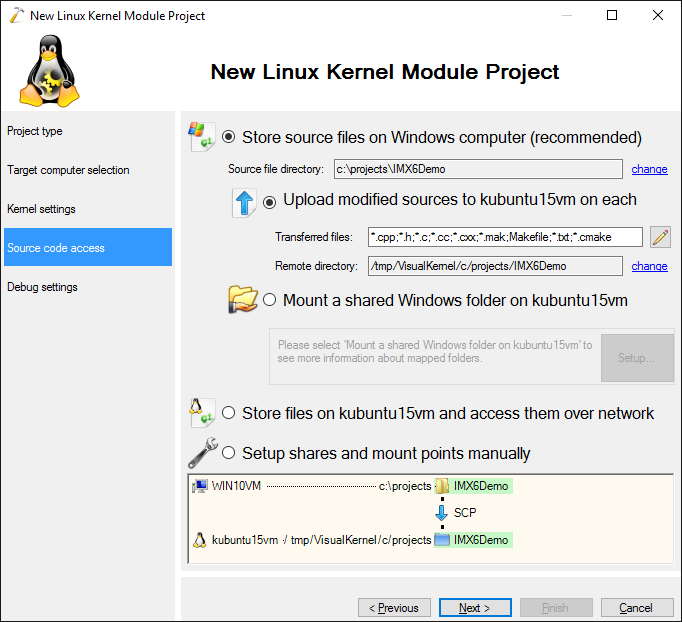
 - By default, VisualKernel will simply transfer the modified source files to the Linux machine where you have cross-compiled the kernel and will build them there. Press “Next” to accept these settings:
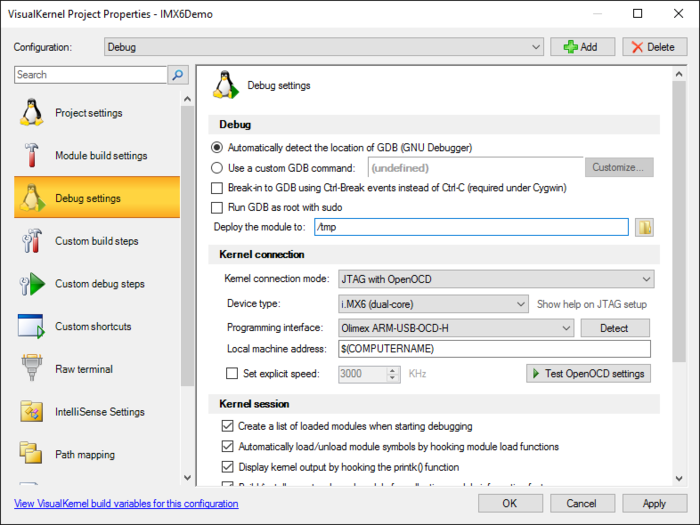
- On the Debug Settings page select “Debug an embedded board via JTAG”. VisualKernel will automatically install OpenOCD if it’s missing. Select your device type (dual-core i.MX6 in this example) and click ‘detect’ to auto-detect the programming interface (it needs to be connected via USB first).Then click ‘Test OpenOCD settings’ to automatically diagnose common driver problems:
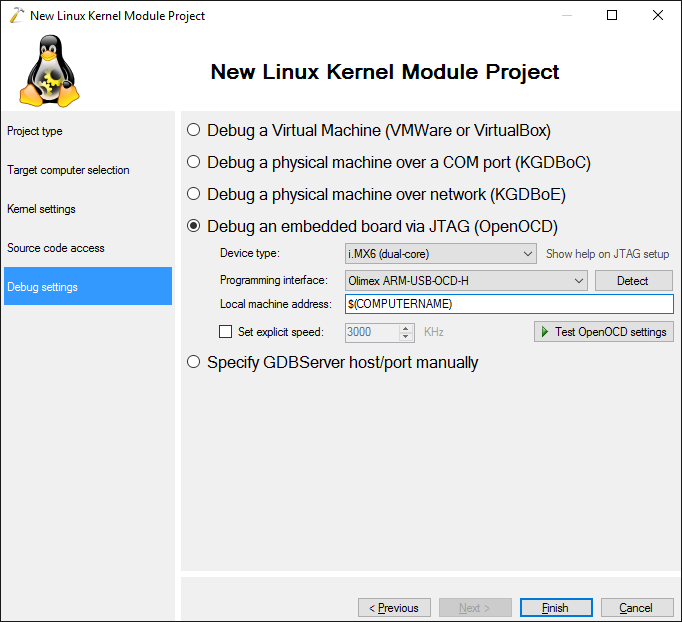 As OpenOCD will be running on the Windows machine and the gdb will be running on the Linux machine where you built the kernel, the Linux machine will need to connect to the Windows one in order to access the JTAG interface. By default VisualKernel will use the hostname of the Windows machine to establish the connection. If you want to override this, enter the IP address of the Windows machine in the “Local machine address” field.
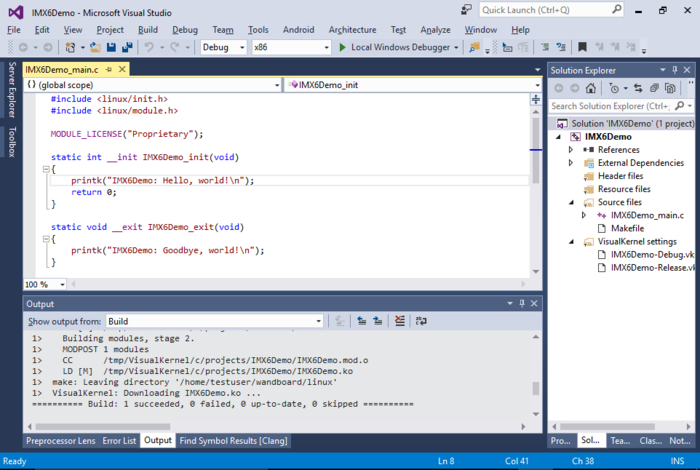
 - Press “Finish” to generate the project. Then build it with Ctrl-Shift-B:
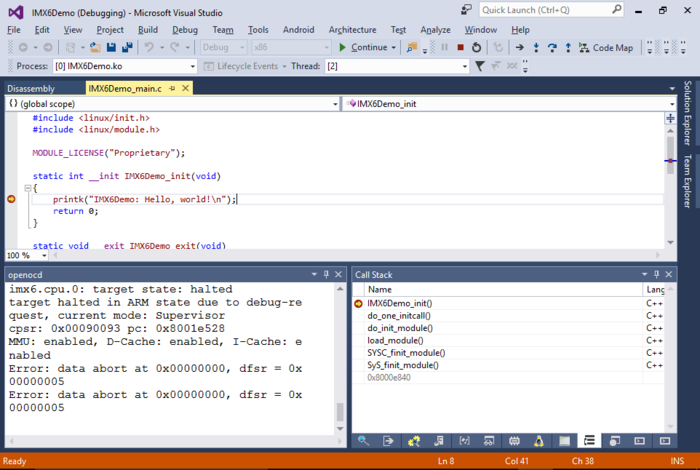
- Once the project is built, you can set a breakpoint in the init() function start debugging it by pressing F5. VisualKernel will automatically launch OpenOCD, establish connection between it and the Linux machine, load the module and fetch the symbols for it once the module is loaded. Your breakpoint will then trigger:
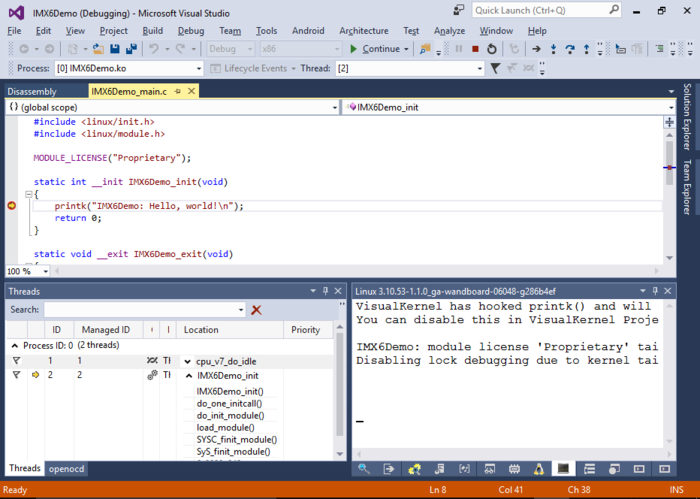
- The Sysprogs OpenOCD fork used by VisualKernel automatically translates CPU cores to threads. So you can open the Threads window to see the status of the cores. You can use the Freeze/Thaw commands to suspend and restore the cores, but it may lock up the Linux kernel as it normally does not expect it:
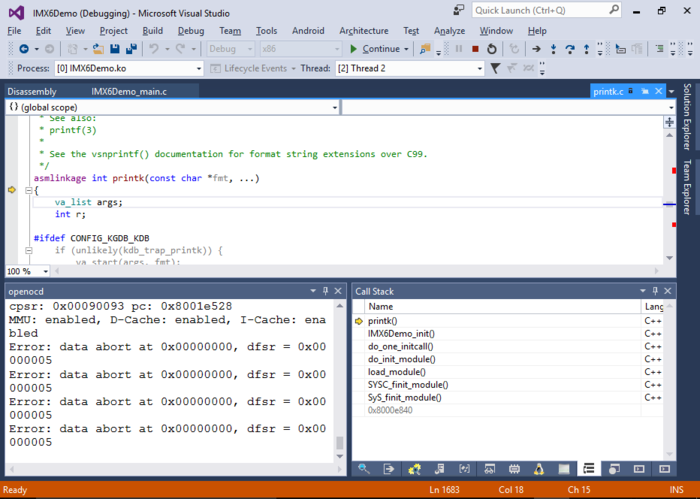
- You can step into the printk() function by simply pressing F11. VisualKernel will automatically fetch and display the related sources:
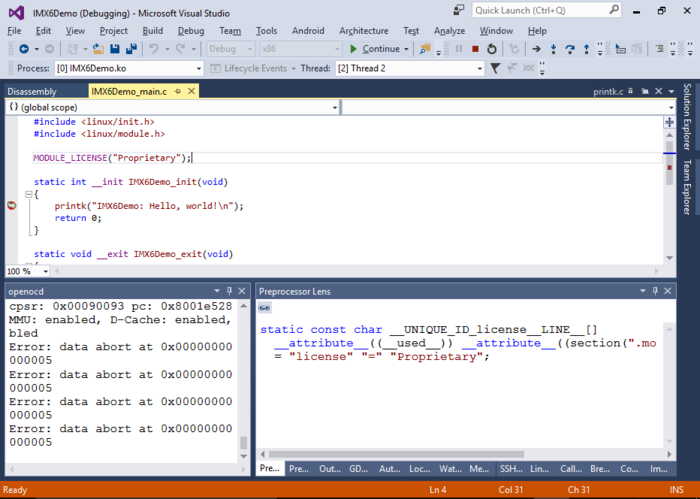
- The Clang-based IntelliSense engine provided by VisualKernel can also automatically expand complex preprocessor macros. Simply select a line with such a macro, right-click and select “Preprocess Selected Lines”:
- You can configure various VisualKernel settings (e.g. switch from JTAG to Ethernet-based debugging) by right-clicking at the project and selecting VisualKernel Project Properties: