Building and modifying Linux Kernel with Visual Studio
This tutorial shows how to build the Linux kernel, add a small modification to it and debug the new kernel using Visual Studio with VisualKernel.
We will use a Kubuntu machine to build the stock kernel provided by the distribution and then modify it so that it shows how much time has elapsed since loading of each kernel module.
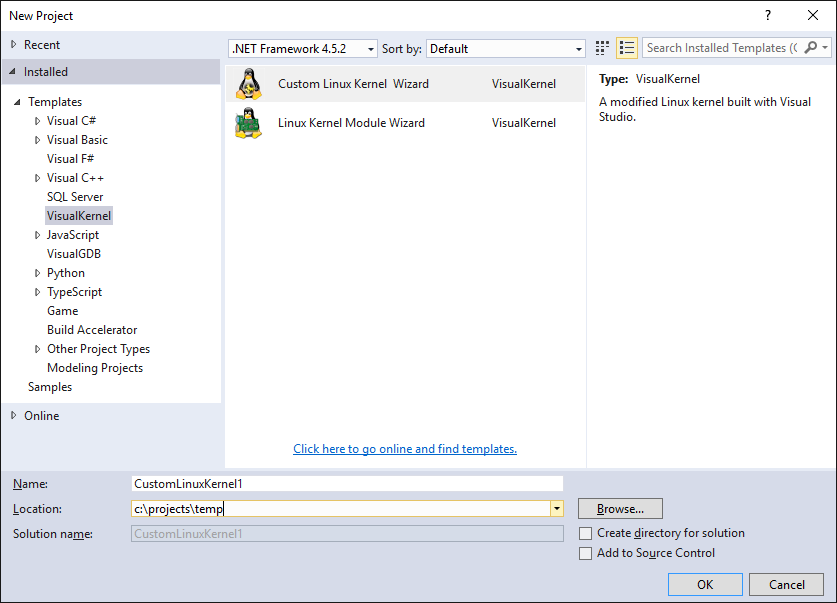
- Before we begin modifying the kernel we should create a Visual Studio project for it. Open Visual Studio and start the Custom Linux Kernel Wizard in the VisualKernel folder:
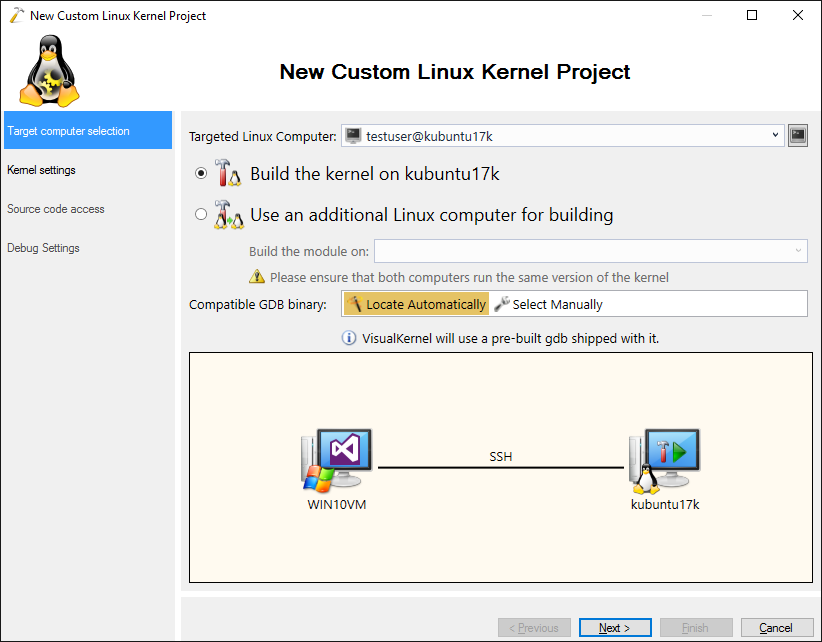
- On the first wizard page select the remote machine you want to target. Ensure your Linux user account is in the sudoers group, as otherwise it won’t be able to install the kernel:
- On the next page select “automatically download sources for the current kernel”. This will work for the most popular Linux distributions. If you are not running one of them, you can also specify a pre-configured kernel source directory:
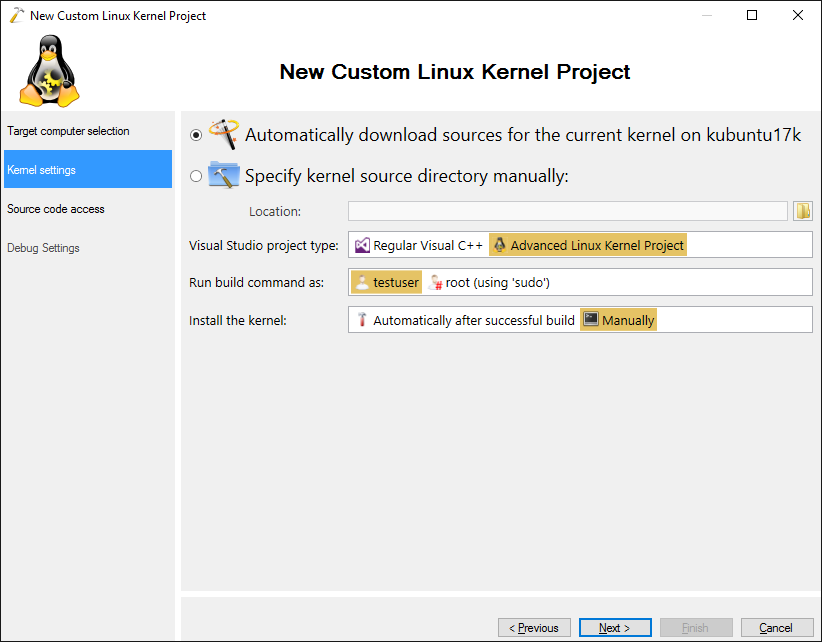 For all new projects we recommend using the Advanced Kernel Project Subsystem as it is especially designed to handle the huge Linux kernel codebase.
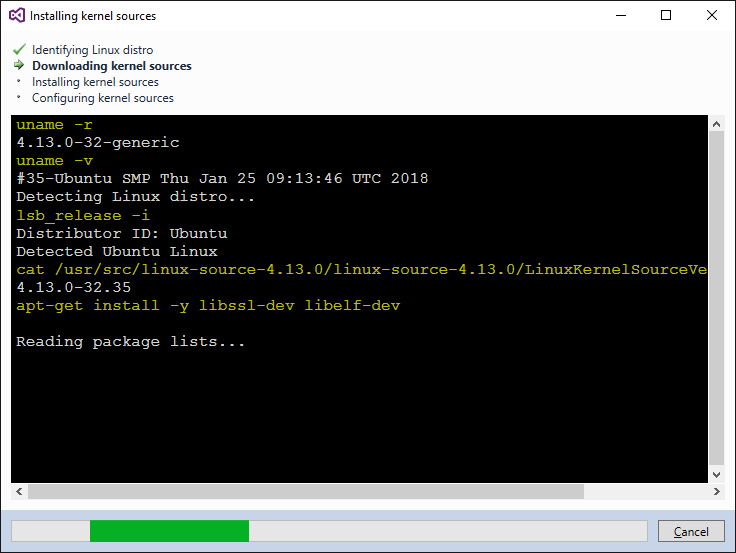
 - VisualKernel will start downloading the kernel package and preparing it to build. This can take 5-10 minutes depending on your Internet connection speed:
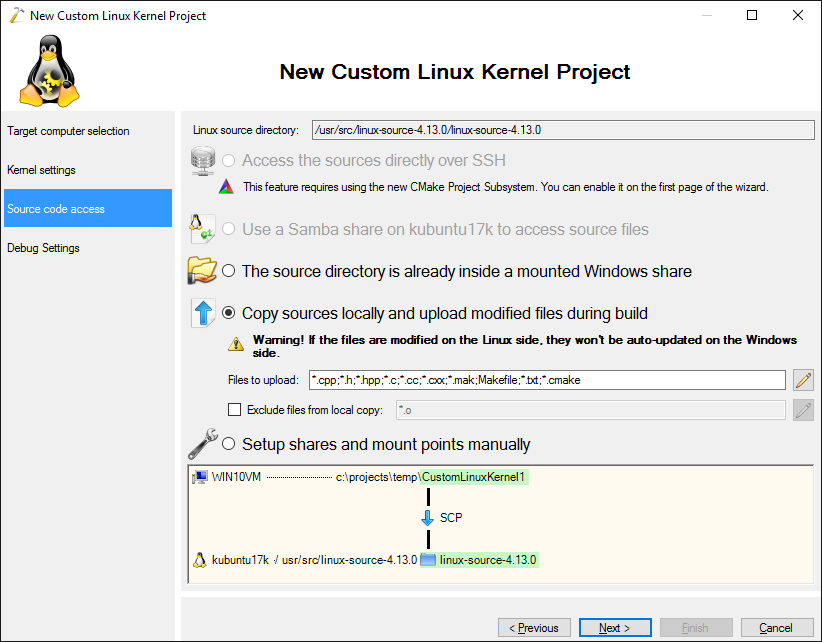
- Once the kernel source package is setup, the wizard will ask you for a directory on the Windows machine where the sources will be copied. Note that Linux Kernel source is huge so ensure you have enough free space on your disk:
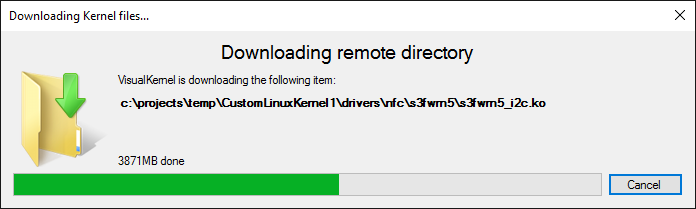
- Once you click “Next” VisualKernel will start downloading the source code to the Windows machine:
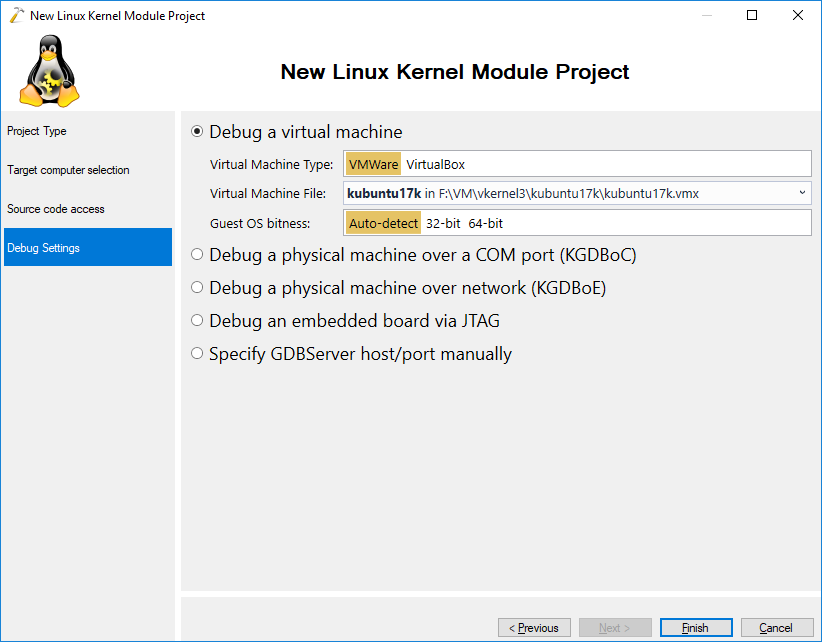
- On the last wizard page select the method you want to use to connect to the kernel. If your changes do not depend on custom hardware, we recommend a VMWare virtual machine with a VMWare-specific debug connection. This connection method utilizes the highly reliable gdb stub that runs inside VMWare and outside the target kernel and hence won’t be affected if the kernel freezes:
- Press “Finish” to complete the wizard. VisualKernel will create the project and start querying the project structure from KBuild:
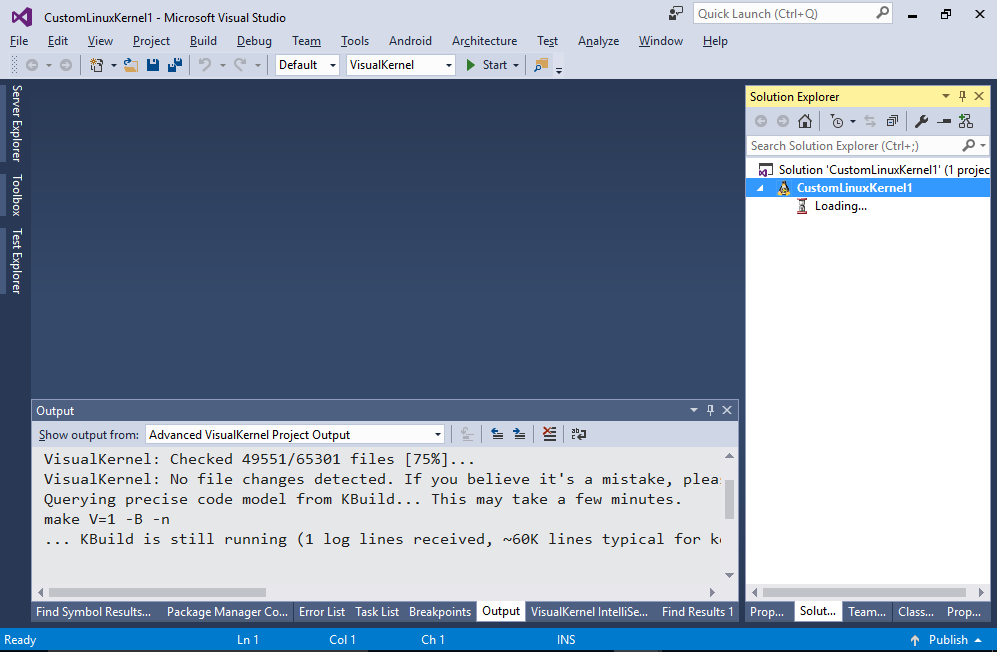 Note that the first load may take several minutes (VisualKernel relies on KBuild to report build arguments for each source file inside the kernel in order to build accurate IntelliSense database). Once the project is loaded, VisualKernel will cache its structure and will re-query it in the background if it detects changes to project files.
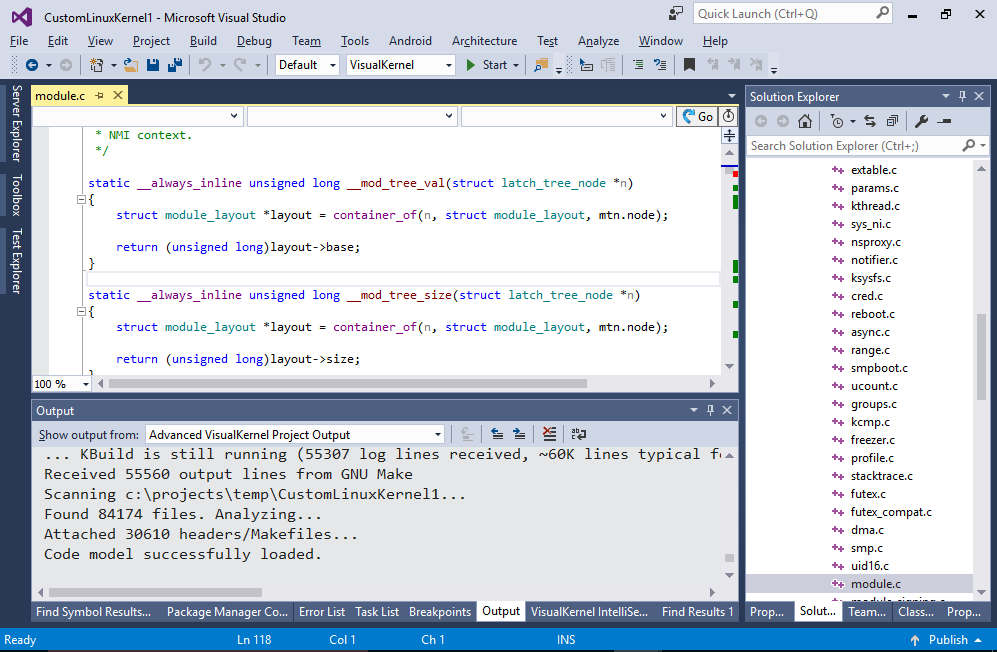
 - Once the project is loaded, all source files relevant to your target platform will appear in Solution Explorer:
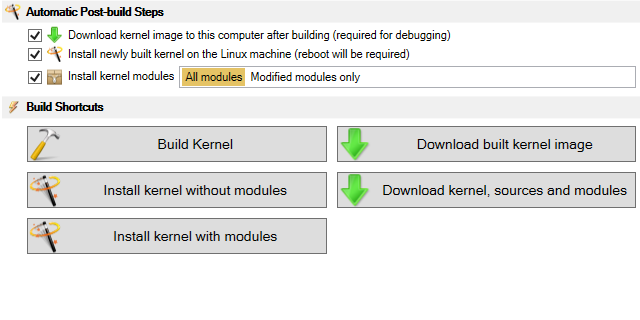
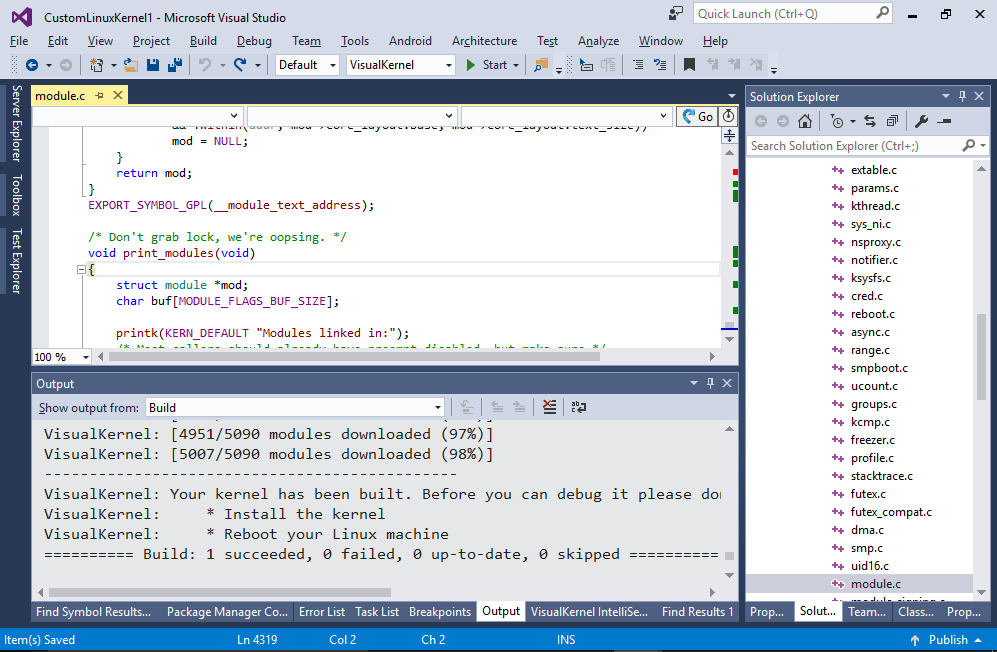
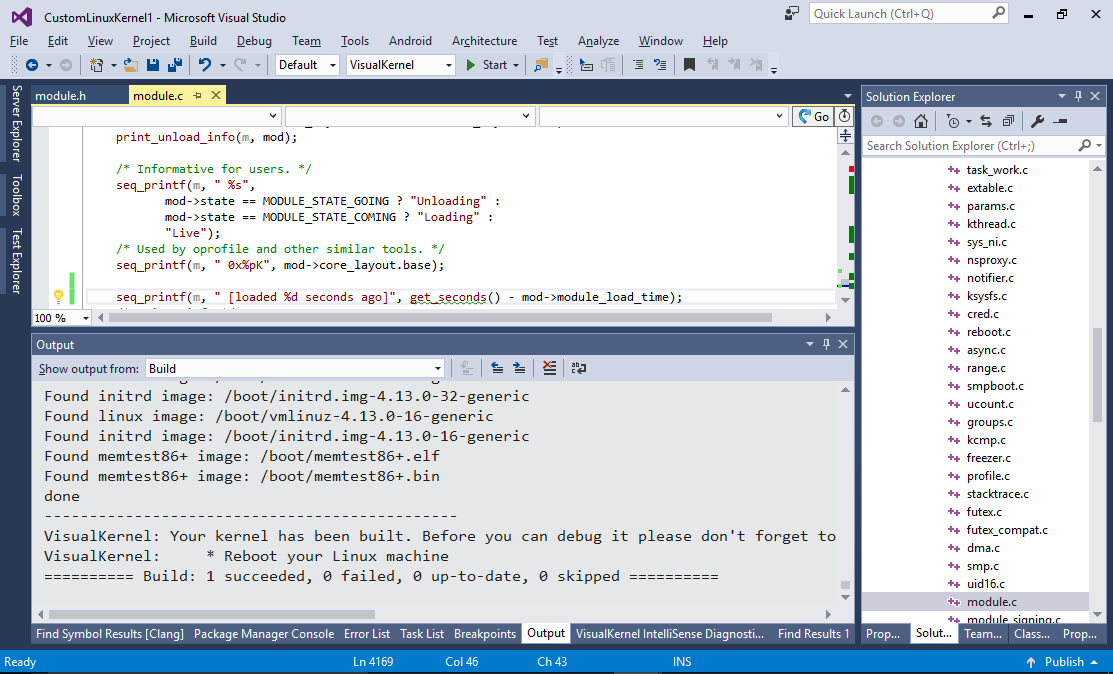
- Build the project by pressing Ctrl-Shift-B. Note that the kernel is huge so it may take up to 2-3 hours to build. If your Linux machine has multiple cores, VisualKernel will automatically detect it and run the multi-threaded build. Once the build is complete, VisualKernel will list the missing steps before you can test it out:
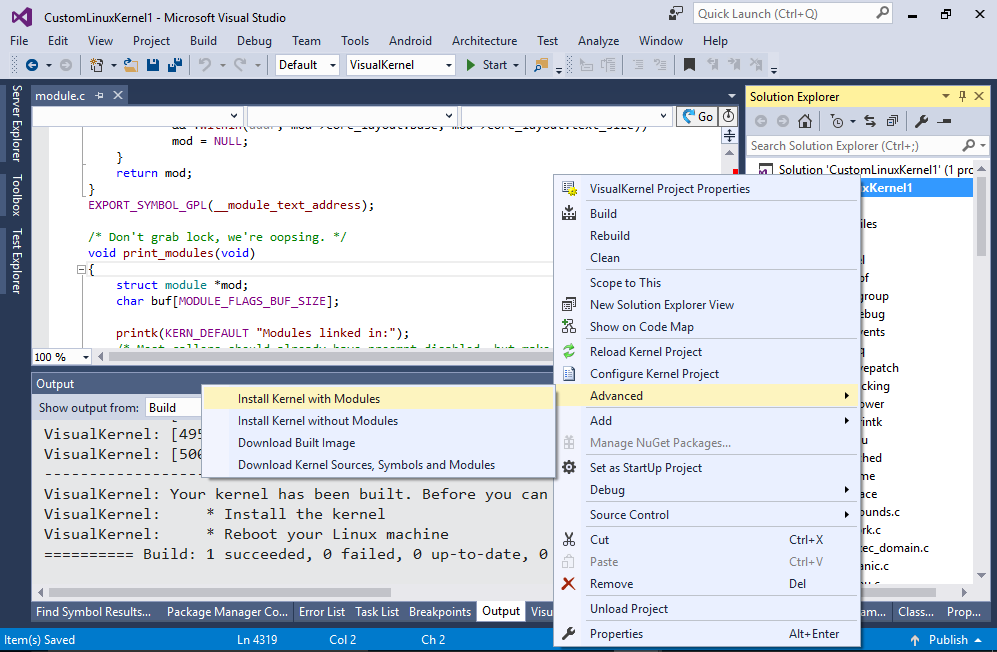
- Install the kernel by right-clicking on it in Solution Explorer and selecting “Advanced -> Install Kernel with Modules”:
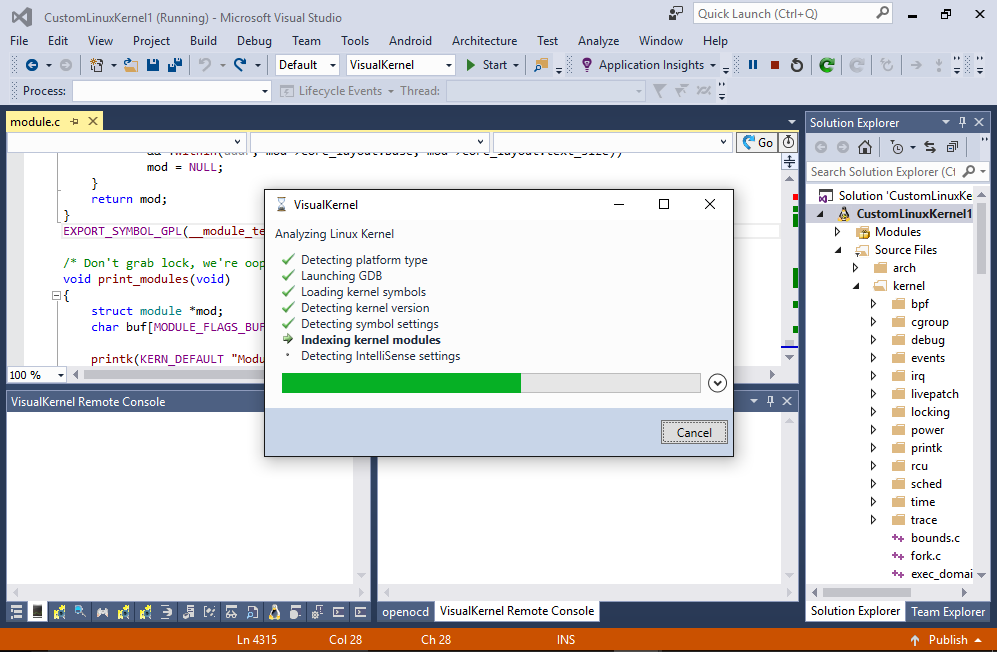
- Now we will test the debugging. Reboot your Linux machine so that the new kernel is loaded. Then press F5 to start debugging. If you are debugging this kernel for the first time VisualKernel will take some time to index the in-tree kernel modules:
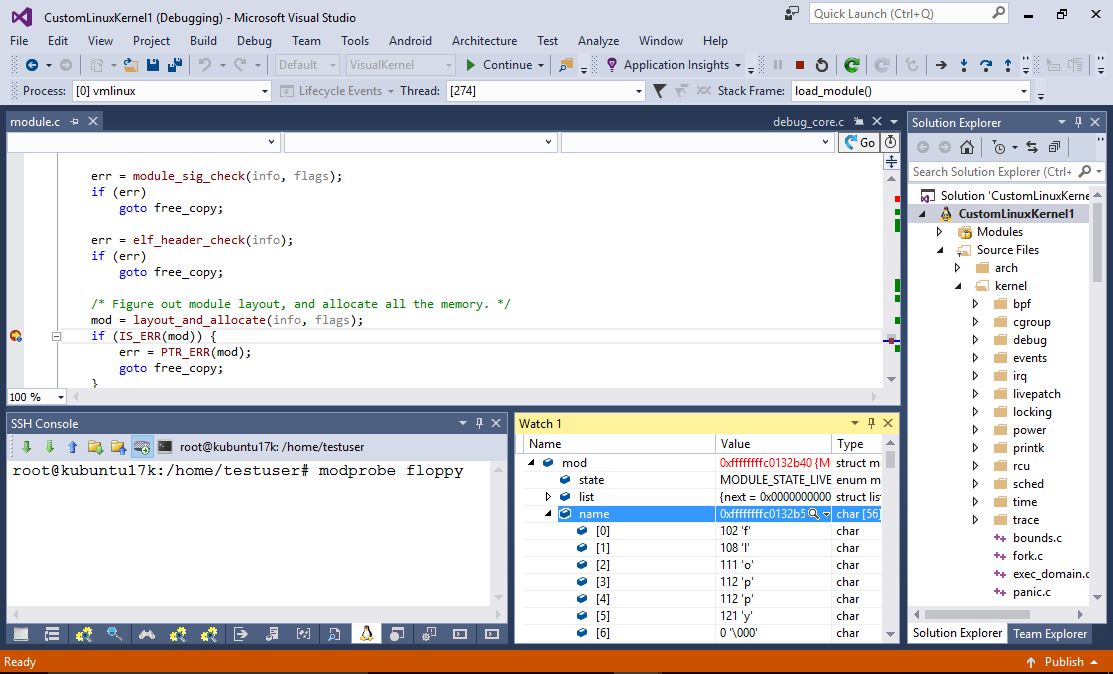
- Set a breakpoint inside the load_module() function. Then go to the SSH Console and type the following commands:
sudo rmmod floppy
sudo modprobe floppy
As you can see, the load_module() function allocates the mod object that stores various information about the module:
- Now we will modify the kernel to store the load time of each module. Right-click on the module word and select “Go to Definition”.
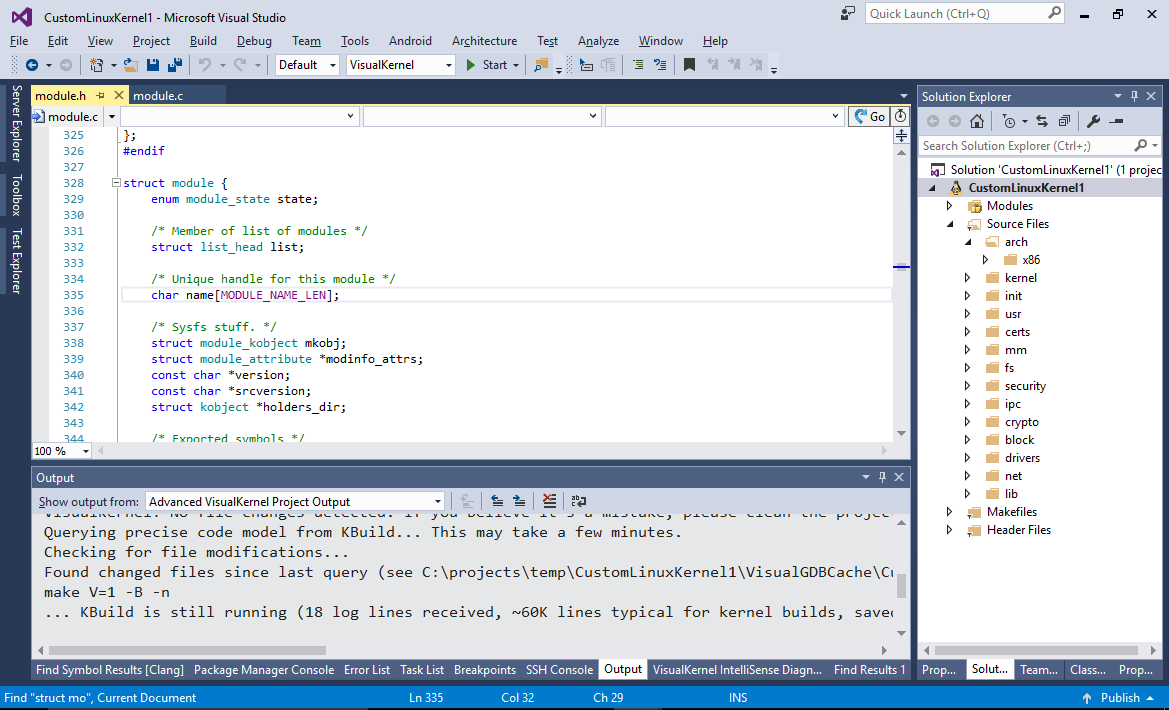
- Add the following field to the end of the struct module:
time_t module_load_time;
- Add the following line to load_module() after mod is allocated and checked:
mod->module_load_time = get_seconds();
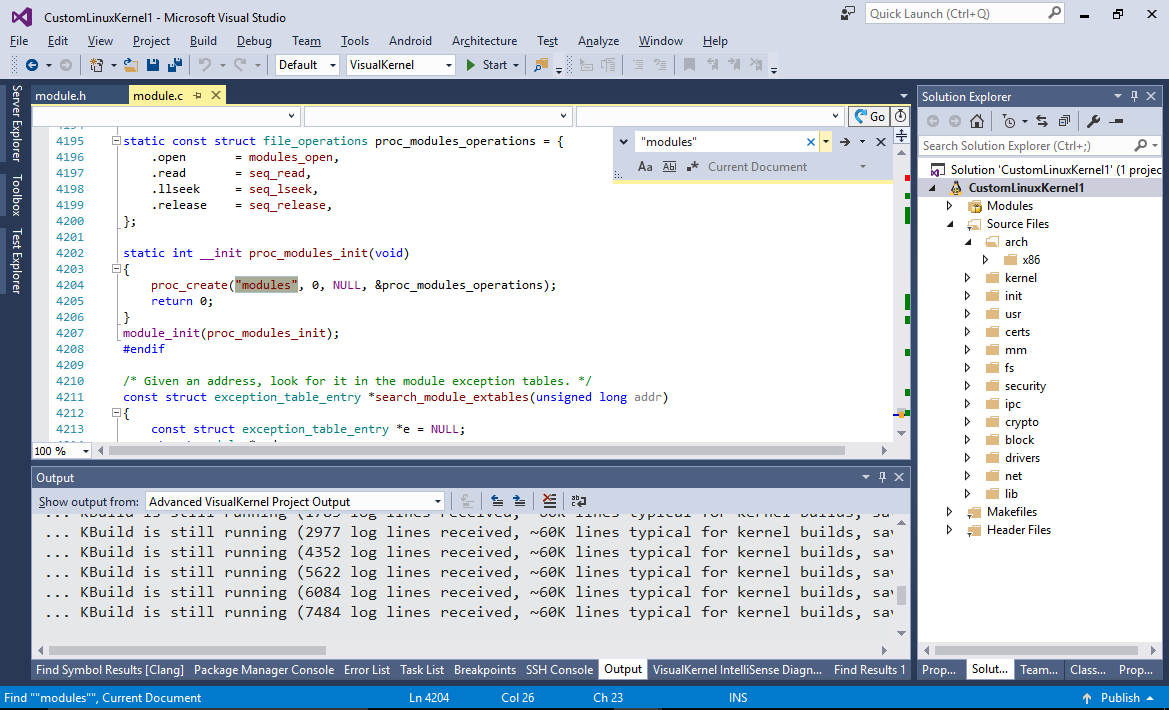
- Now we will find the code that manages the /proc/modules file. Search for “modules” (with quotes):
- Go to definition of modules_open() and then to definition of modules_op and m_show(). Add the following line before the last call to seq_printf():
seq_printf(m, " [loaded %d seconds ago]", get_seconds() - mod->module_load_time);
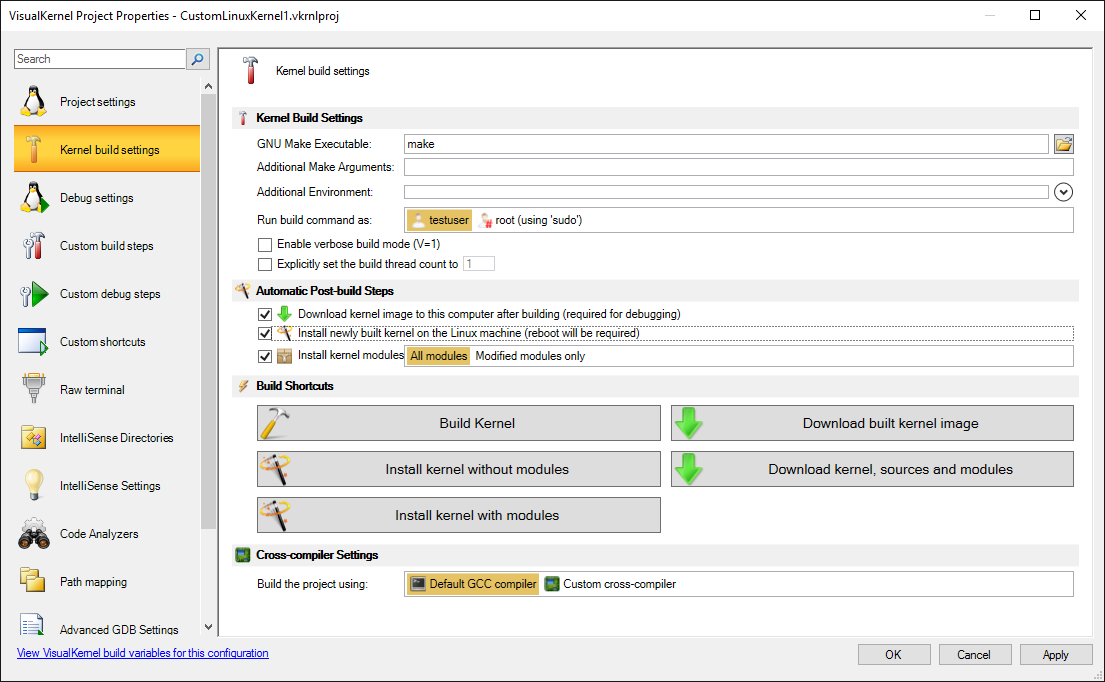
- Open VisualKernel Project Properties and enable automatic installation of the kernel after build:
- Press Ctrl-Shift-B to build the modified kernel. Note that VisualKernel will only re-upload the 2 source files you modified. However as the modified module.h is used by many other files, rebuilding the kernel will take a long time:
- Restart your Linux machine so that the new kernel loads. Start debugging and run the following commands in the SSH Session window:
sudo su
sudo rmmod floppy
sudo modprobe floppy
cat /etc/modules | grep floppy
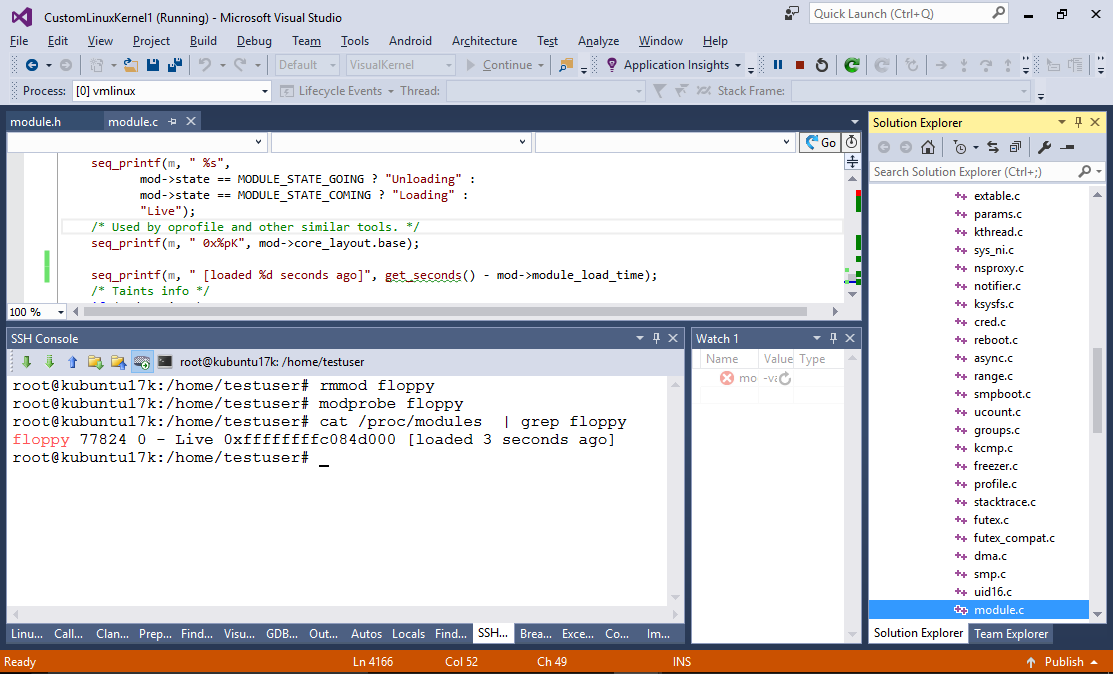
- You will see that each line now contains the information about the load time. Set a breakpoint on the added seq_printf() call and re-run the last command again:
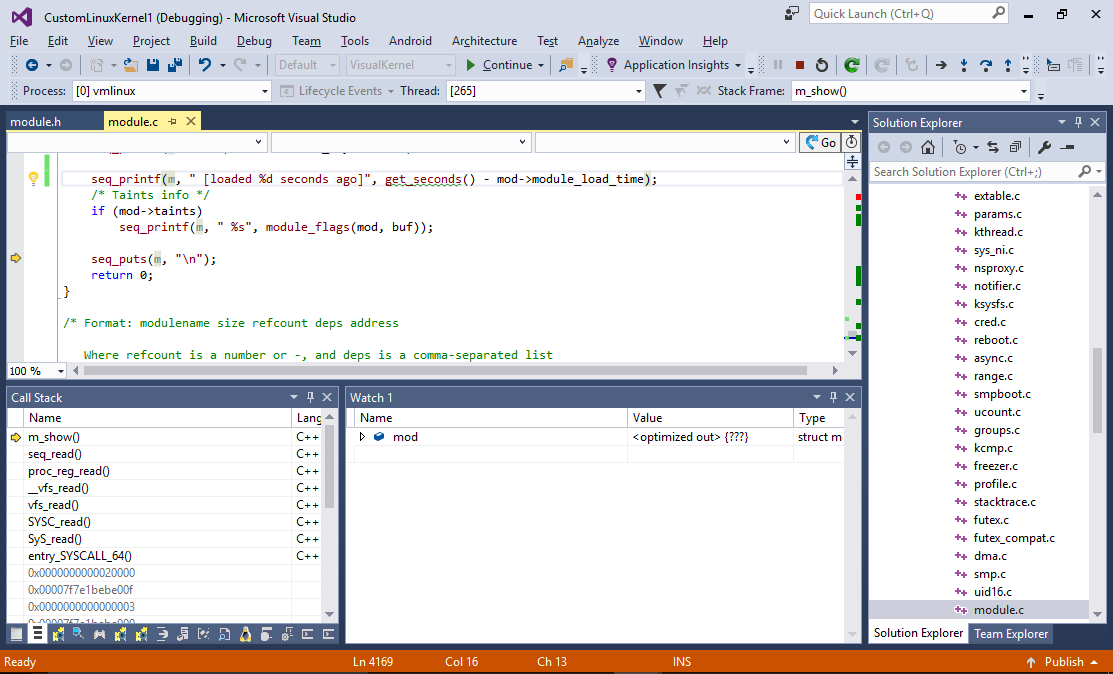 You will be able to step through your new code and examine the variable values just like when debugging normal programs.
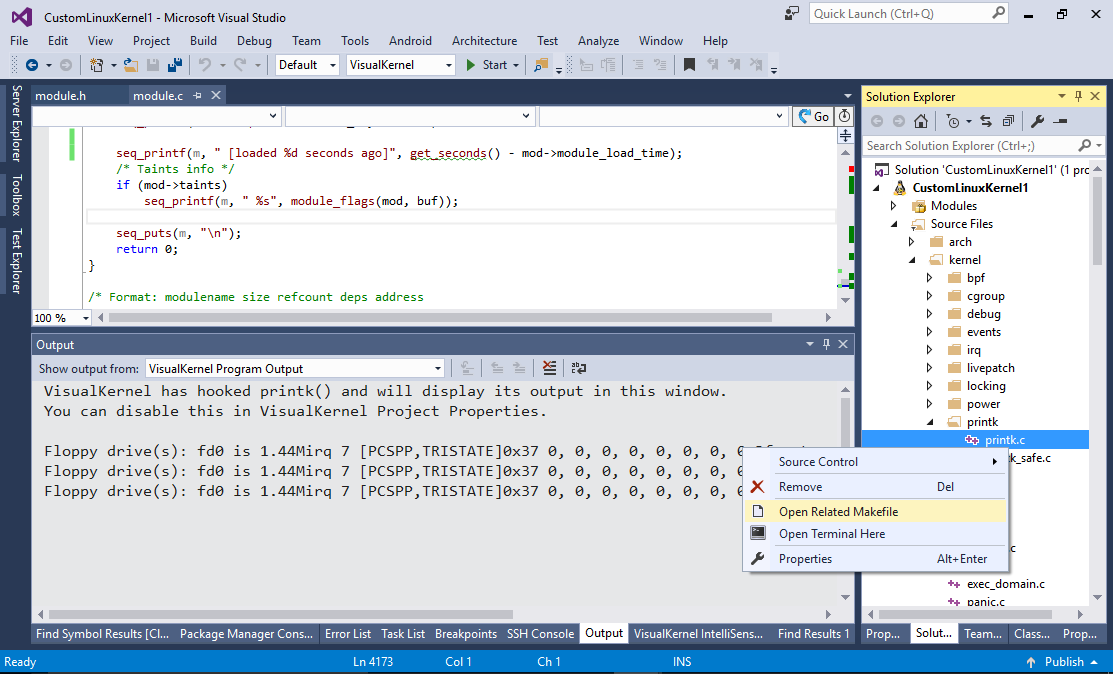
 - Unlike the kernel module projects where VisualKernel will automatically edit the Makefile when you add/remove files, custom kernel projects won’t be automatically updated. You can still add/remove files via Solution Explorer, however those changes won’t be preserved after you reopen the project. In order to physically add a new source file to the project, right-click on any of the sources in the same directory and select “Open Related Makefile”:
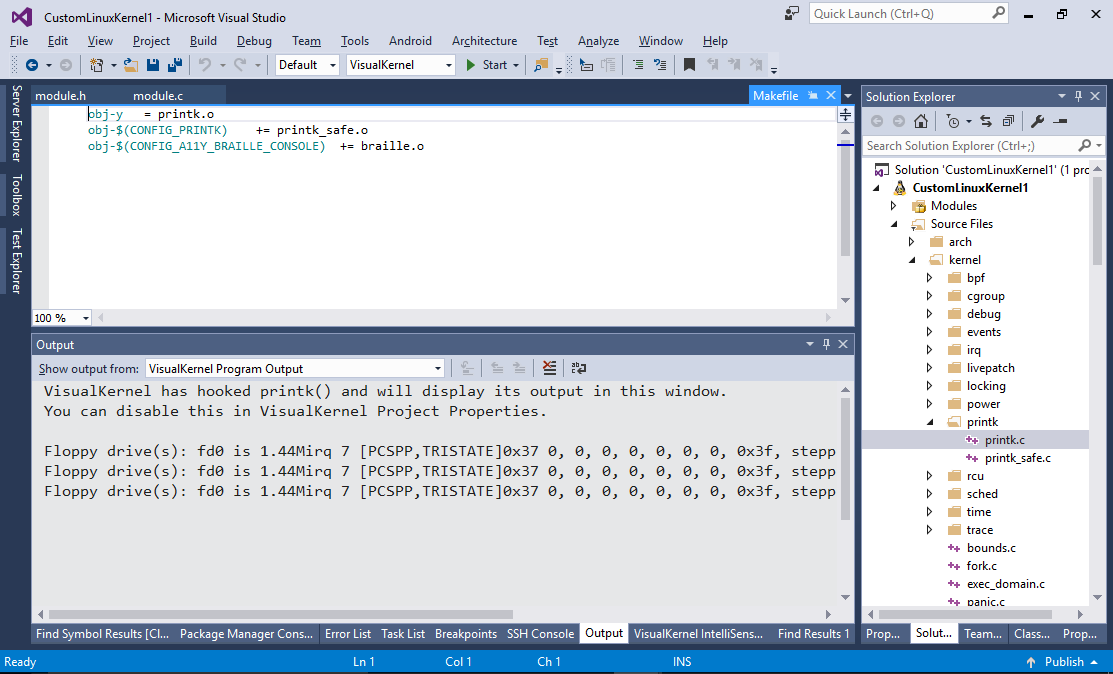
- Once the makefile is open, you can edit it to update the actual files used by KBuild:
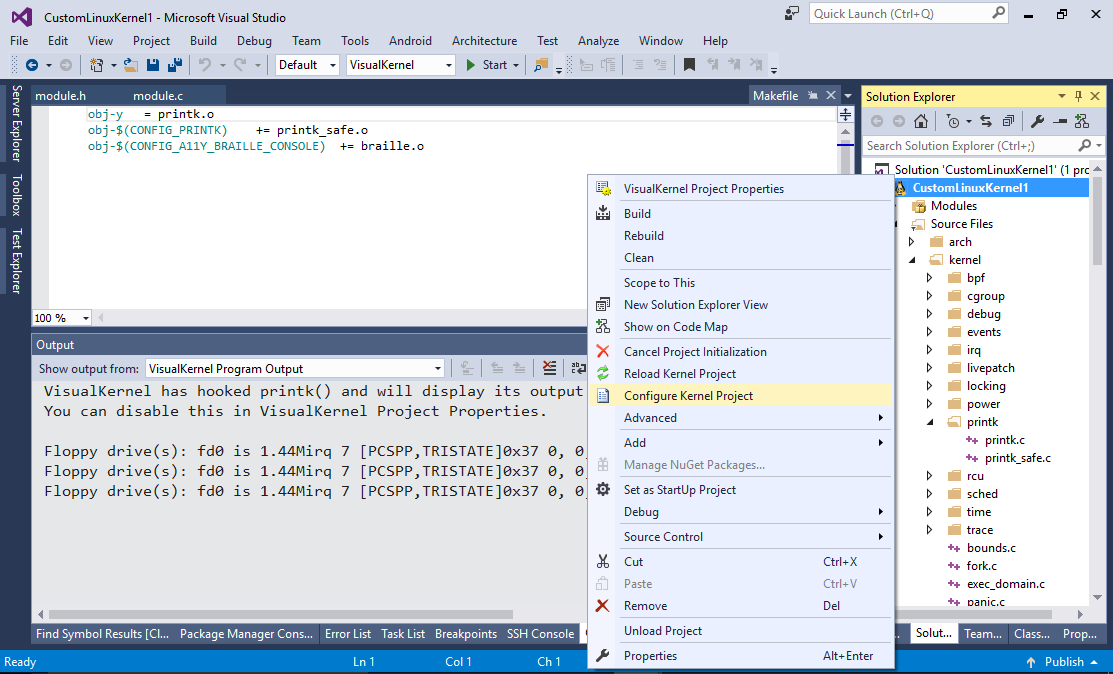
- VisualKernel also provides convenient interface for configuring the kernel. Right-click on the kernel project and select “Configure Kernel Project”:
- Click “Launch graphical configurator”:
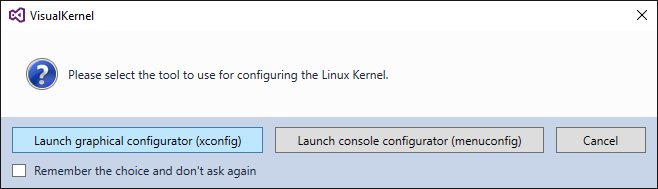
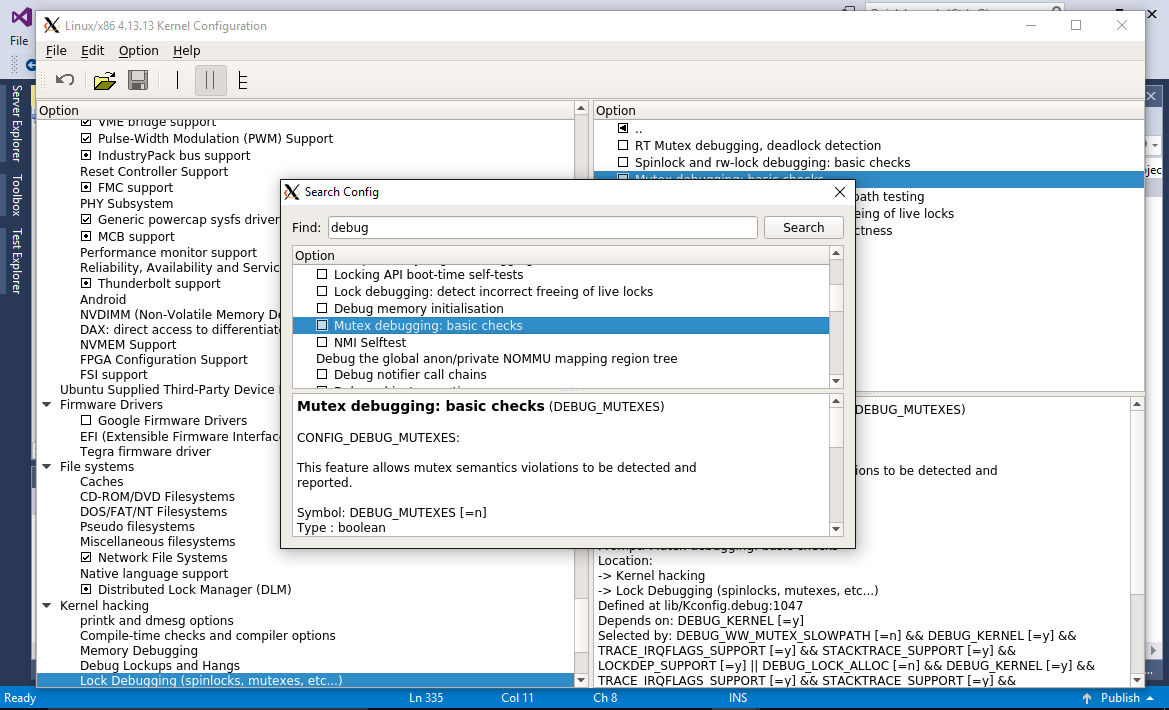
- VisualKernel will automatically launch the xconfig tool letting you tweak various kernel settings directly from your Windows machine:
 If you change the kernel configuration using xconfig, don’t forget to build and install the new kernel.
You can avoid long build times and frequent restarts by moving your experimental code to a kernel module and loading/unloading it dynamically. Read this tutorial to learn how to create modules for custom kernels built with VisualKernel.